Hair Tutorials: 7 Incredibly Chic Ways to Wear Bobby Pins
Happy Monday Gorgeous!
It's the beginning of a new week and what better way to get it started then by having seven different hair tutorials?
Thanks to Latest-Hairstyles.com and Wendy Rose Gould, today's hair tutorial post will definitely come in handy this week when you find yourself lacking a little hairstyle inspo.
According to Wendy, "Bobby pins sort of get the short end of the stick. I mean, they’re super utilitarian, obviously, but pretty much every single tutorial out there tells you they should be tucked away, hidden from the world and never to be seen by a single soul."
"Of course, there’s a time and place when you don’t want your bobby pins to show, but today we’re here to set the bobby pin free. We came up with some bobby pin inspiration for you and have given a how-to for each. If you’re feeling even more playful, try using brightly colored or metallic bobby pins as you experiment with these incredibly chic ways to wear bobby pins."
#1 The Half-Up Bobby Pin Nest
How To: After teasing your hair at the crown and gently combing it out, pull back half of your hair to create a half-up hairdo. Instead of securing hair with an elastic, though, twist it twice to the right and then begin inserting bobby pins to secure. Don’t worry about being strategic or uniform or symmetrical. Instead, create a messy nest of bobby pins. Not only will your hair be very secure, but it’ll look cool. The more bobby pins and the more haphazard their placement, the more “on purpose” it will look.
#2 The Half Up Braided and Bobbied
How To: Create two small-to-medium braids on either side of your head. Pull them to the back until they meet and then insert four criss-crossed bobby pins. For an additional touch, and so people know you’re not ashamed of your bobby pin game, insert three horizontal bobby pins above the braids at the center of your head.
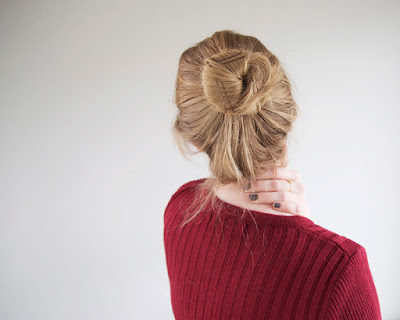
#3 The Messy Bun Meets Bobby
How To: Gather your hair near the crown of your head as if you’re going to put it in a messy ponytail. Begin wrapping it around itself, then secure the entire bun with a clear elastic. Keep your bun very loose, very casual and very undone. From there, add three sets of two bobby pins around the bun.
#4 The No Reason Zigzag
How To: This one’s great because the bobby pins serve no purpose other than to look pretty. Just above your ear, insert two diagonal bobby pins. From there, create a zigzag by adding two additional bobby pins on top and then two below.
#5 The Super Side Swept Lattice
How To: Create a very deep side part, pulling a large portion of your hair to one side of your face. Insert two bobby pins point away from your face. From there, fold over a small section of the pulled aside hair and insert two addition bobby pins (this time toward your face) to keep the fold in place. Repeat, this time pulling hair from the front portion of your pulled aside hair and folding it over. Insert two more bobby pins to keep it in place, again with bobby pins pointing away from your face. Repeat once more on the other side of the pulled aside section, bobby pins pointing toward your face again. Don’t get too caught up in making this look perfect or the same as the image featured here. Just keep folding sections of the hair back and forth and securing with alternating bobby pins to create a lattice.
#6 The Covered Pony
How To: Divide your hair into three sections, with the largest section in the middle and two smaller sections on either side. Gather the middle section into a low ponytail and secure with a clear elastic. Drag one section of hair over the top of the ponytail and wrap it around, securing with a bobby pin. Repeat on the other side. On either both sides or one side (your choice), insert four fanned out bobby pins.
#7 The Pinned Rosette
How To: Gather a small section of your hair above your ear and gently twist the hair around itself to create a spiral. Place the rosette flat against your head and insert two criss-crossed bobby pins.
Now it's your turn: Which of these chic ways to wear bobby pins will you try to recreate this week? Let me know in the comments - I'm looking forward to hearing from you!


