Showing posts with label beauty routine. Show all posts

Friday, August 16, 2013

Back to School: Super Speedy Skincare

BeautyStoreDepot

TGIF Dolls! The weekend is officially here...finally!

This week was dedicated to providing you with basic beauty tips - especially for those of you who will be going back to school this month. To recap, here is what was featured earlier this week:

Back to School: Tools of the Trade {we hand selected which beauty tools you should have in your beauty kit for flawless makeup application}

Back to School: Five tips to a better shave {who wants to run around in gym with knicked legs, right?}

The last post for this mini-series is going to help you get in and out of the bathroom in three minutes or less...Say what? Yes! It's possible!!

Check it out:

female washing face


Super Speedy Skincare in three minutes or less: 

0:00 - Wash your face messaging the cleanser into skin using circular motions.

0:50 - Rinse face off with tepid water - patting dry with a clean soft washcloth.

1:00 - Using a cotton pad, apply toner onto skin. Give it a few second to dry.

1:30 - Tap a pea size amount of eye cream to the tops of cheekbones working your way up to the lower eyelashes. Use your ring finger to do this and for the love of God, DO NOT rub!

2:00 - Now it's time to moisturize. Smooth your daily face cream or serum all over the face and neck area - avoid the eye area. Let the moisturizer do its thing and sink into your skin.

2:30 - Skin is now prepped for some SPF. Yes, you need to use SPF everyday...and I mean E.V.E.R.Y.D.A.Y.! Apply it to your face, neck and hands.

3:00 - Your done!! Now you can either start priming your skin for makeup, or just run out the door...your choice, but make sure you're fully dressed before runnning outside!!

And..that's how it's done!

Give this super speedy skincare morning routine a try. Who knows..You may just amaze yourself at how quickly you can get ready in the AM!


PS. Don't forget to check out the amazing back to school offer from Sigma Beauty: 

Back to School Promo: 15% off all eye shadow bases and Synthetic Precision 4 brush kit
When: Thursday, August 15-Thursday, August 29
Discount: 15% Off
Code: B2S2013


Now its YOUR turn: How long does it usually take you to get ready in the morning? Let us know in the comments!

[photo credit: weheartit.com]

Monday, June 24, 2013

Bridal Season 2013 - Skincare for the Bride to Be

Early last week we shared our first Bridal Season 2013 post, where we showed you three simple yet classic wedding guest outfits. Here is the link to that post for your reference: Bridal Season 2013 - Apricot Collection - Wedding Guest Edition.


skincare for the bride to be


In today's article we are going to concentrate on the bride to be only - specifically skincare tips.

When you are a bride to be, you don't want to compromise on anything. This includes every detail from your wedding favors to your wedding gown and jewelry. So, why compromise on having less than perfect skin on the day itself? 

For women who have normal skin, you may not feel the need to put in extra effort to ensure that your skin is in good condition before your special day. However, women who have dry, oily, or combination skin must take extra care of their skin to ensure it is free of skin problems and glows with good health.

It's never too early to begin a skin care routine to ensure healthy and clear skin, even if this means starting a few months before your wedding ceremony.

If you have oily skin, you will need to keep a range of products especially formulated for oily skin at hand. Usually women who have oily skin tend to have a drier epidermis but an oily underneath. Depending on the season you are getting married in, try your best to have a range of products that you can use during that particular season to maintain the health of your oily skin.


BeautyStoreDepot- Brand Name Beauty for Less


Here is the ideal routine for oily skin:

Cleanser: Your facial cleanser should be gel based. Apply it on your face and neck with soft circular motions and rinse carefully, making sure you splash water at least 10 times. In case you are getting married in winter you can use a creamier cleanser as you skin may become dry.

Product Recommendation: Avene Diacneal Gel Cleanser

Toner: Never use an alcohol based toner! These toners will dry your skin surface completely, while locking the impurities beneath it leading to pimples or ever acne. You must never over dry you skin. The best toners for oily skin are those with AHAs.

Product Recommendation: Lerosett Purifying Acne Toner

Tip: Apply cucumber water with a clean cotton pad for a refreshing and clean feel.

Moisturizer: Moisturizing oily skin helps prevent the release of more oil and pimples, since dry skin leads to production of oil. A cream that helps mattify the surface of your skin will give you a clean, clear, and younger looking skin - exactly what you need on your wedding day!

Product Recommendation: Pevonia Botanica Mattifying Oily Skin Cream

Foundation: If you want to use a foundation as a base for bridal make-up that will work, always make sure you cleanse your face and neck thoroughly before going to sleep. On the day of, try to use only oil-free formulas. If you feel that applying a oil-free foundation, then try applying mineral makeup instead. Here is an article that explains how to get the best makeup look for the hot summer season.

When removing your makeup, use a make up remover made especially for oily skin type and use a clean cotton ball to wipe away the eye shadow, mascara, lipstick, liner etc. You must also use a good quality facial exfoliant to get rid of the grime, dirt, and clogged pores. Ideally you should use an exfoliant only twice each week, and concentrate on your 'T' zone (the forehead, nose, and chin).

Here is an easy do-it-yourself article we posted on making an oatmeal scrub exfoliant.

Finally, if you have followed the routine laid out for you and are still affected by skin problems, run to an expert. A dermatologist will be able to offer you better solutions and ensure your beauty is not just skin deep on your nuptials!


Image courtesy of imaferymajestic /  FreeDigitalPhotos.net

Now it's YOUR turn:  Are there any other specific bridal topics you would like to read on our blog?  Let us know in the comments! 

Do you know of someone who is a bride to be?  If so, please feel free to share this post with them!  

In our next article in the Bridal Season 2013 series, we will be sharing a few more beauty tips for the bride to be...Stay tuned! 


Disclosure: Certain links for the suggested product recommendations are affiliate links. By purchasing any item via these affiliate links, you are helping support this site and helping to keep it online. Thank you very much for your continued support.

Monday, January 28, 2013

Getting Healthy Skin is not Impossible

Have you ever felt self-conscious about your skin? Do you find yourself comparing your skin with other women, thinking that their skin appearance is better than your own?

If your answer was yes, please do not feel ashamed - I often find myself doing this exact same thing! However, this habit can be changed. How? The easiest way is to first learn how to take care of your skin. Yes, most of us have a skin care regimen, but are we really taking good care of our skin? or are we just applying skin products hoping for the best results?


The good news is, obtaining youthful skin can be achieved. To find out more on this subject, please take a look at an article I wrote for the Lovely Pink Diva : Healthy Skin Care - 3 Easy Steps ....{HERE}

Want to read more about skin care tips? Take a look at these three related posts:

Take Care of your skin this winter
The Powers of adding a Exfoliating Cleanser to your Skin Care Routine
Get rid of Tired Puffy Eyes in Two Steps


Now it's YOUR turn: How do you take care of your skin? Let us know in the comments!

PS. Don't forget! Valentines Day is a little over 2 weeks away! Get your Spice Box before then! {Watch this VIDEO}


Don't miss out on any of the latest skin care articles and exclusive posts! 
Get them delivered straight to your inbox! 


Delivered by FeedBurner

Wednesday, November 28, 2012

10 Commandments of Foundation - Beauty Infographic

Joyful Wednesdays Beauties!

I was thinking about what beauty/makeup post I wanted to share with you today when I realized that it has been a few weeks since I shared a beauty infograph with you. If you recall, one of the last infographs shared on the website was all about the 10 Commandments of Lipstick.

In today's beauty infograph we will be taking a closer look at the simple yet sometimes forgotten 10 Commandments of Foundation. The ten rules for using foundation are very novice but they do hold a lot of meaning when you really think about how using/applying foundation can either "make or break" your overall appearance when wearing makeup in general.

So, let's take a look at the 10 Commandments for Foundation that every woman should be aware of:


Related Post : Style United...Your very own personalized virtual makeover 


Now it's your turn: How many of the 10 Commandments of Foundation do you already practice? Do you have any additional tips you would like to share with us? 

Please let us know in the comments! We love hearing from you!

Tuesday, November 27, 2012

Product Launch Exclusive: Defining Eyes Palette by Tiffany D


Last night I found myself sitting in bed with my IPAD2 nestled in its keyboard working through my inbox when I received a particular email notice. At first, I was going to ignore the email however as I took a closer look, I immediately noticed what the topic of the email was: a new product launch exclusive! 

To give you an idea of exactly how excited I was, I leaped out from under the covers jumping to the side of the bed  doing my happy dance all around the bedroom! Does that ever happen to you? You get that overwhelming feeling of finding something new?  I love it when that happens!

By now you maybe wondering what new product am I referring to, right? I am referring to the New Defining Eyes Palette by Tiffany D.


The Defining Eyes Palette is an all-in-one kit design to enhance, amplify and brighten your eyes. Everything you could possibly need to get a neutral smokey look.  In the palette you will find:
  1. eight (8) eye shadow shades (In the Dark, Midnight, Fog, Halo, Brunette, Chestnut, Smoke and Beam) These neutral shades are universal - The colors will look amazing  
  2. two (2) gel liners (Blackout and Chocolate) 
  3. a dual ended brush - With this brush you can easily blend the shades together with the eye shading end, then using the pencil dual edge to apply the gel liner along the lash-lines. Having just one brush that does double duty is extremely convenient!
  4. a dual ended eye liner pencil - I love the idea of the dual ended eye pencil, especially because of the brightening effect you can easily create by applying the white pencil on the lower inner waterline as well as the inner corner of the eye. 
  5. The palette also comes with a booklet featuring five (5) of Tiffany’s favorite tips and tricks for using the palette.
In my opinion, this palette is a MUST have for anyone who thinks of themselves as a beauty enthusiast (like me!). Which is why I just had to share this product launch information with you.

The Defining Eye Palette  would also make a fabulous gift - The kit has all the tools needed already included in it, so there is no need to buy anything additional.  The Defining Eye Palette is a limited edition and will only be available until supplies last, so you know what that means!

Now it's Your turn: I placed my order earlier this morning - I can't wait for it to arrive so I can try these shades out. Don't miss out so make sure you order yours today! 

PS. Check out Tiffany D's post on her blog for up-close photos of her swatches and a DISCOUNT CODE for The Defining Eye Palette!  

Tuesday, November 13, 2012

Get Rid of Tired Puffy Eyes in Two Steps


You have spoken. We have listened.

The first beauty post being featured during this week's Beauty Bash Event will be all about the eyes, specifically under eye skin care.  Your eyes are one of the most important features of your face which is why it's vital to take good care of them.

Most women will probably say to themselves, "I do take care of my under eye skin - every time I moisturize. Isn't that enough?"

The answer to this questions is: NO, that will never be enough! Moisturizing the skin on your face is one thing but knowing how to take care of your eyes is another. 

The skin under and around your eyes is very delicate in comparison to the rest of your facial skin and as such, this skin needs a little more attention. Adding a few simple steps into your regular skin care routine will certainly help you maintain your under eye skin (and eyes) appearing youthful and refreshed.

1.  Only use eye creams - NOT face creams

Most facial creams have certain ingredients that can extremely harsh on under eye skin.  You want to make sure that you only apply eye cream instead. There are two (2) eye creams that have proven to be very effective in protecting this delicate skin area.


Get Defensive SPF 15 Eye Cream

What it is: This eye cream provides SPF protection as it hydrates, soften lines around the eyes and reduces puffiness. The cream is light-weight which allows the skin to quickly absorb all of its properties.

Main Ingredients: maqui berry + licorice root

Benefits:
SPF provides both UVA and UVB broad-spectrum protection.
Cream increases under eye skin moisture.
Instantly makes the eye area look brighter
Reduces the appearance of dark circles and puffiness


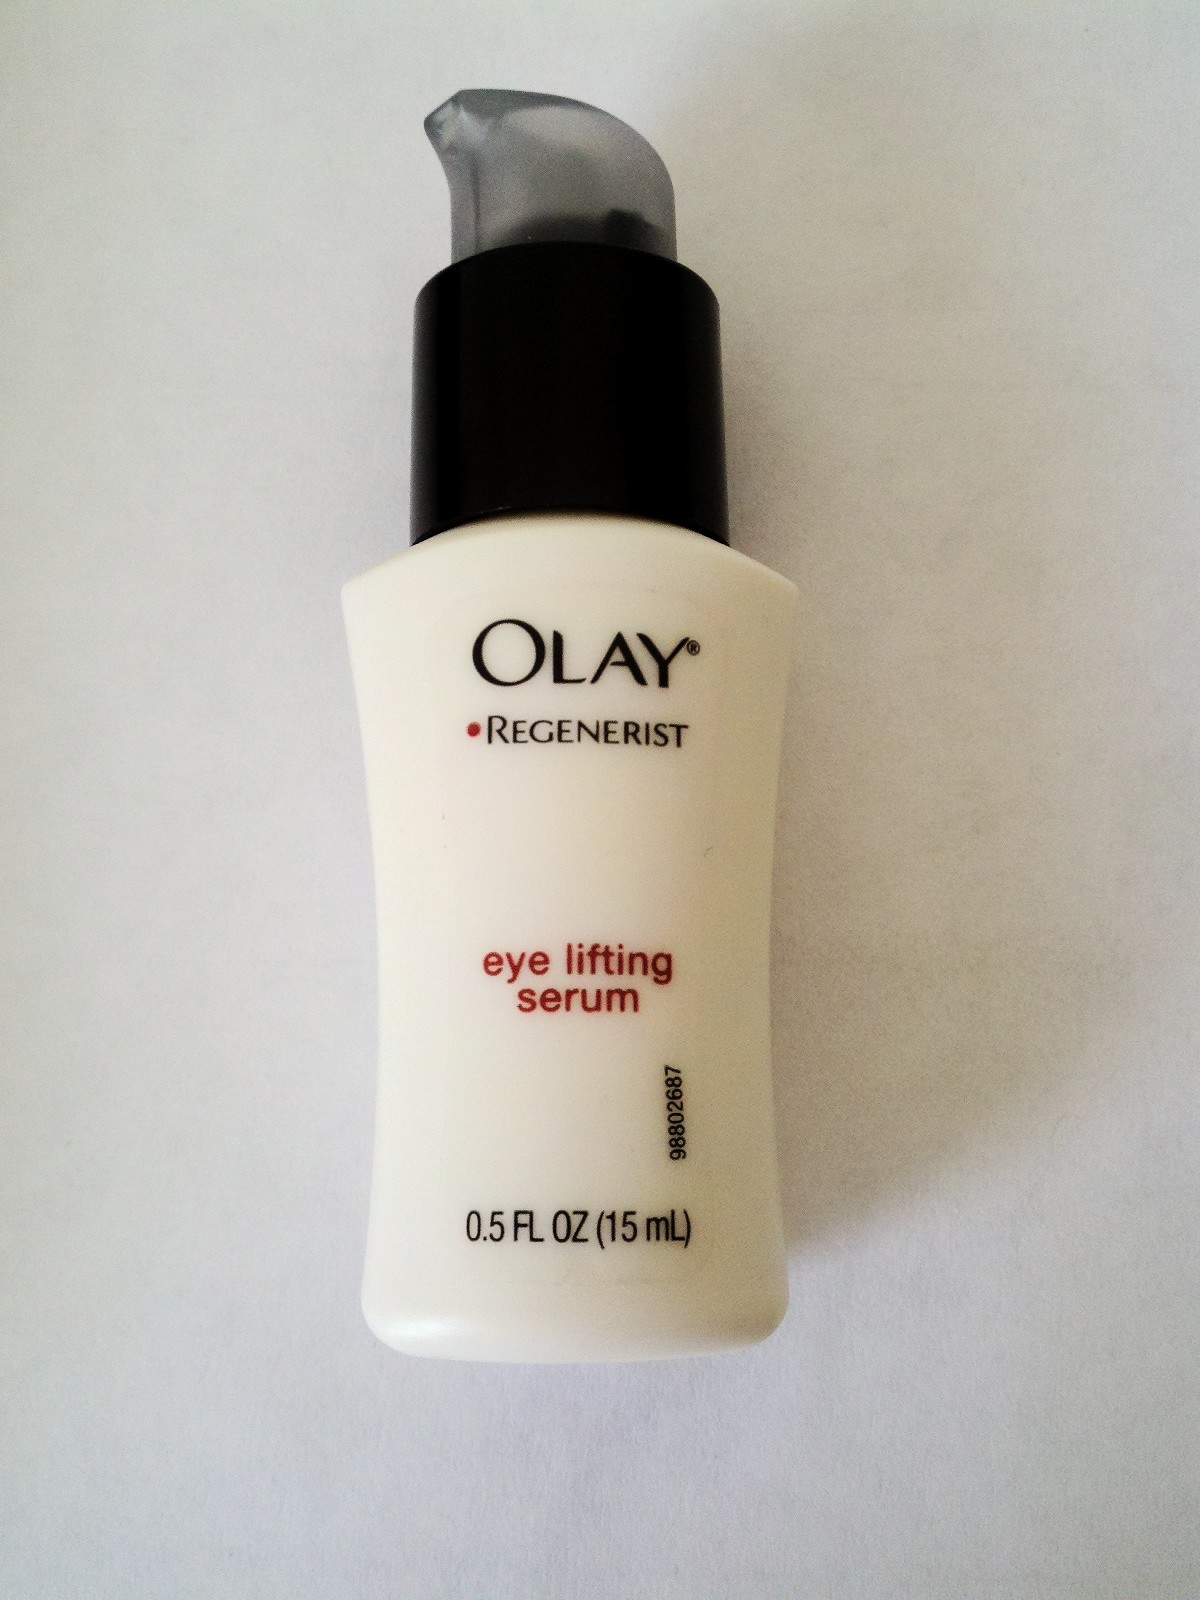
Olay Regenerist Eye Lifting Serum

What it is: A fragrance-free eye serum formulated to smooth fine lines around the eyes, hydrate under eye skin while providing lift to the skin.

Main Ingredients: concentrated amino-peptide + B3 complex

Benefits:
Serum brightens under eye skin
Smooths fine lines
Hydrates to help firm and lift skin appearance around the eyes

2. Application

Using these eye creams is a great start to improving your under eye skin care, however knowing how and where to apply the creams is even more important.


Applying the creams about 1/2 inch above upper and lower lash line is more effective than applying cream directly onto the eyelid and under eye areas. Eye creams tend to "travel" throughout the skin so applying it above/under the eye will ensure that the creams are absorbed by the areas you are targeting (ie. puffiness, crows-feet, fine lines under lash lines).

Using the ring finger, apply the cream by making small dots along the areas above eye. Gently pat the cream into skin.

Applying eye cream should be done at least twice a day - morning and night. A suggestion for those who experience tired puffy eyes, before beginning your skin routine place eye cream in fridge for a few minutes. Applying "cold" eye cream will refresh under eye skin and reduce puffiness almost immediately...plus it feels so good!


Feeling good and rejuvenated is "a great thing". Taking just two steps in the right direction can make all the difference. Remember: Your eyes are the windows of your soul.... so why not make sure these windows stay youthful and refreshed?

Now it's Your turn: Do you have any special "tips" on under eye skin care that you like to add?

top photo credit:  Source: 24.media.tumblr.com via Elle on Pinterest    

Wednesday, November 7, 2012

DIY Exfoliant: Oatmeal Scrub

photo credit: free digital photos


Many of us love the idea of going to a local Spa - whether it be to get our nails done, hair treatments, facials or full body messages - but unfortunately sometimes going to the Spa can be costly.

Having that thought in mind, I wanted to bring the Spa to You by sharing some of my naturally made skin care recipes. 

When this thought of  Do-It-Yourself  home skin care came about,  I had been experiencing breakouts of adult acne. It's really surprising for me to say this, but now that I think about it, my skin rarely broke out during my teenage years. I don't know if I should think of it as a blessing or a curse. On some days, I honestly believe that it is a curse!

Over the years, I have tried several methods of taking care of my skin by purchasing and using some of the most expensive skin care kits. This does work but it certainly brings "new" skin issues along with its good results. 

One of the side-effects of using topical skin creams and toners is that even the oiliest of skin can get very dry and flaky; especially around the mouth, chin and jaw line. The worst thing is when you are trying to apply your makeup and all you can see are little skin flakes making their appearance under the layer of makeup. I cannot tell you, how annoying that is! This is something that always happens to me after using medicated skin care products.

So, not being able to "suck-it-up" any longer I decided that I would exfoliate my skin to rid myself of these annoying flakes. And that I did!

For the past two days, I have been using a d-i-y Oatmeal Scrub. The results can be seen almost instantly. After using the oatmeal "paste" my skin feels soft and supple - there is no tightness to the skin what-so-ever.

Here is what you will need to make this Oatmeal Scrub at home:

  • about 1/8 - 1/4 cup of old fashioned oats
  • a few teaspoons of milk (or water)

Using a food processor or small coffee grinder, grind the oats until they become powder like. (I used my coffee grinder and it worked amazingly well!)
In a clean bowl, mix the oats with a few tsp. of milk.  Basically you want to end up with a semi-thick paste.

I have found that the easiest way to use the oatmeal scrub is during my evening shower. I do this for several reasons: my skin is already damp and clean, my pores are open due to the steam the shower creates and it's just easier to clean up!

After I am done washing up, using my fingers I apply the oatmeal scrub to my face/neck/chest gently rubbing in circular motions starting at my forehead continuing downward until all the oatmeal has been used. (if I have extra I also apply scrub on my arms and legs)

I like to let the scrub sit on my skin for at least 10 min. Then I rinse off with lukewarm water following up with a splash of cold water (doing this will help your pores to close). Lastly, using a clean soft towel, I pat my skin dry; then I apply toner followed by a moisturizer.

Simple and yet, so very effective. What I like most, is seeing immediate results - there is nothing better than that!


Now it's your turn: Have you ever used oatmeal as a skin defoliator before? Would you give this treatment a try? Let us know in the comments!

Wednesday, September 26, 2012

Getting over Hump Day with sneekpeaq

It's Hump-Day Beauties!

Wednesdays can be the most difficult day of the week. It's that one day when moods can be at there very lowest. The thought of  struggling to get everything important taken care of is an instant buzz-kill!  This is something that everyone goes through - But it doesn't have to be that way!

One of the many "guilty pleasures" that we like to indulge in on Hump Day, is checking out what the  daily deals are on sneakpeeq.com  Yes, you guessed it: online shopping is the easiest way to lifting your spirits...it's an undeniable fact!  Any-who....

Sneekpeeq is an online retailer that has daily offers on every kind of item you can think of. Most of the products that are featured are unique and fashionable. The products that are showcased are from well known brands who specialize in skin care, fashion apparel, jewelry and even household items can be found. So, needless to say,  you will always find that one special find that you just have to buy! Trust me, this is very true - My husband can attest to it ;) 

Really, the best part about sneekpeaq is that not only are there new items featured almost everyday - BUT once you become one of their New Members, you automatically receive a $10 credit plus a free gift just for signing up. It's always nice to get something for FREE, right?

Which brings up the question: What is the featured item today?  Take a look at this MUST have "eyecandy....


Eyecandy coolers are back with their strap-free, chillable eye coolers! These cute little cucumber slices help to rejuvenate the delicate skin around your eyes. Having these on hand are really great - whenever you feel the need to just lay your head back and relax, simply place them on your eyes - and get immediate relief!  Eyecandy coolers are fun, flirty and functional, these are great for your next at-home spa day!

We adore the Classic Chillin' Cucumber eye coolers - they're a great combination of old and new, and yours for only $1 with your $10 New Member Credit!

Additionally... Here is a free gift for becoming a new sneakpeeq member: 

Welcome autumn with open arms and get a look lifted from the pages of October's fashion mags. The Autumn Glow Bracelet has a rustic appeal, perfect for the season's warm sweaters and rich textures. Pair it with wraps, jackets and coats, and watch your cold-weather wardrobe come to life.


Now it's your turn:  Get your FREE Autumn Glow Bracelet while supplies last! Please come back and let us know what items you saw on sneakpeaq that are now your must have products! We look forward to speaking with you!

Saturday, August 25, 2012

Kissable Lips and How to Get Them

photo credit: freedigitalphotos.net

Are you ready to pucker up? You should be! Today just happens to be Kiss and Make up Day. For right now we wont concentrate too much on the "making up" part of today. Instead let's get our lips ready for kissing.

For some insane reason some of us tend to forget that our lips are an important feature of our faces, and as such, our lips need to be taken care of. There should be no second guessing about it. Period.

Now, the question of the day is: How can we obtain kissable lips?

It only takes a few steps. The first step is to exfoliate. Our lips, just like the rest of our skin, needs to be rid of dead skin and flakes. Trust me, no one want to kiss dry flaky lips - this is just unacceptable!

What should you use to exfoliate your lips? Make a simple lightweight natural lip scrub. Here is a recipe for a lip scrub I make and use year round.


Lip Scrub:

1 tsp brown sugar
1 tsp honey

Mix together brown sugar and honey until these form a paste. Using a clean finger, place a thick coating on your lips. You want to leave the scrub on lips for a few minutes (about 3-5 min) then very gently start scrubbing with your finger until all the dead skin has been scrubbed off.

Please note: Immediately after scrubbing lips it is imperative that use moisturize them. Do not skip this step!

Here is what I like to use for keeping my lips nicely moisturized -


I really like using this lip smoother right after my lip treatment. All I do is take a pea size amount, dab it on both lips and I'm done! The lip treatment is transparent, glides on lips very smoothly and really does keep my lips moisturized.

Note: If you don't have a favorite lip smoother - you can always use a dab of petroleum jelly or even a dab of olive oil! It's just that simple!

Let's recap: The key to kissable lips only involves 2 (two) steps: exfoliate and moisturize 

Now It's Your Turn: Have you ever tried using a lip scrub before? If so, which one? Do you have any personal tips to share that helps keep your lips smooth and kissable?

Tuesday, August 14, 2012

13 Reasons to use AHA Brazilian Peel


Over the last month or so I have incorporated the AHA Brazilian Peel facial treatment in my skin care routine. If you haven't had a chance to read about this amazing product, please feel free to read my first two initial blog posts here:

1. AHA Brazilian Peel: Antidote for Aging
2. AHA Brazilian Peel: Round Two


In this third and last post, I wanted to just highlight all the reasons why Brazilian Peel is such an amazing skin care product.
  1. This facial treatment is stronger than most of the other types of peels I have used in the past.
  2. It does not cause skin to irritate or cause redness.
  3. Applying the treatment is very simple.
  4. It only takes 10 min for this treatment to work into skin.
  5. One box of Brazilian Peel has four (4) applications - this is a month's worth of treatment.
  6. Each application has the exact amount needed for your facial.
  7. Removing the peel is non abrasive - it is easily removed with just water.
  8. The peels active ingredient, Acai, is a natural super anti-oxidant found in the Amazon rainforest.
  9. Secondary ingredients are vitamins B1, B2, B3, C and E - these vitamins are highly effective in treating skin for a younger healthier appearance.
  10. This peel helps reduce the appearance of fine lines, wrinkles and uneven skin tone.
  11. Helps improve skin’s texture, smoothing away dullness, roughness and dryness.
  12. Brazilian Peel was rewarded the 2010 Allure Best of Beauty Award, Best Beauty Breakthrough.
  13. Sephora highlighted the Brazilian Peel as “The Most Buzzed-About Beauty” product in the September 2011 issue of Marie Claire.
If you feel you need even more detailed information about this professional strength facial treatment, please browse their website and beauty blog.

Disclosure: I received the above products through Sublime Media Connection in exchange for an honest review. In no way was I asked to give a positive review.

Saturday, August 4, 2012

DIY Moisturizing Hair Mask


Every woman wants to have long healthy hair. Some of us prefer to use certain hair products to achieve this goal but there are natural methods that we can use in order to achieve similar, if not better, results.

Most times we overlook the fact that there are certain fruits that are not only delicious to eat, but have certain properties to them that when used for beauty purposes, they lend to have good results.

For instance, let's consider the avocado. Avocados are rich in vitamins A, B, C, D, E, and K. Using avocados for our hair can help decrease hair loss, promote hair growth as well as moisturize the hair. This becomes very helpful especially during the hot-dry summer months.

There are two (2) ways that avocados can be used in our hair-care routines. The easiest is by simply taking one (1) ripe avocado, peeling it, placing the meat in a clean bowl and mashing it until it becomes a paste. If needed, add in little drops of water until it reaches a "conditioner" consistency. Then use it as a conditioner.

However, here is my personal favorite way to use fresh ripe avocados in my hair-care.


Avocado Hair Mask

1 small ripe avocado, mashed
1 ripe banana, mashed
1 egg, beaten
2 tbsp coconut oil

In a medium bowl, mix ingredients together making sure they are completely combined. there may be little bits of avocado or banana but just make sure to mash these up before mixing them with egg and coconut oil)

On DRY hair, apply the mixture - massaging mask into hair. If you wish, you can also massage this into your roots.
Wrap hair in plastic wrap or a shower cap leaving mixture on hair for 10 min.
Rinse hair mask out with water until there is no residue left on hair, then proceed to wash hair as normal with your favorite shampoo.

A few side-notes:

  • For those with shorter length hair, just make half of this recipe.
  • If you do not have coconut oil, use olive oil.
  • Use mask once a week or more frequently if your hair is extremely dry.
  • For those who have oily scalp, do not apply the hair mask to roots. Only apply to two-thirds of your hair.
  • Hair mask can be left on hair longer than 10 min but do not use for more than 30min.


Now it's your turn: Have you ever used a DIY hair mask before? If so, what ingredients did you use? Have any suggestions on helping hair become healthier?

Please feel free to comment and join in the conversation - We love interacting with our fabulous readers!

PS. Stay tuned for more DIY ideas and recipes - we have been experimenting in the kitchen which means that we will be creating a new series dedicated to beauty skin and hair care recipes!!

Want to see something in particular? Let us know in the comments or on facebook

Friday, August 3, 2012

AHA Brazilian Peel - Round Two


A few weeks ago I shared a review for AHA Brazilian Peel with you. If you recall the AHA Brazilian Peel is a professional strength facial treatment that you can do yourself in the comfort of your home. In this second post I wanted to highlight the ingredients found in this skin care product that allows it to work so effectively.

The three (3) main ingredients are Glycolic Acid, Acai and Magaldrate. For most of us, reading these ingredients is like reading a foreign language! We really have no idea what they are or how they work.

Here is a simple to understand explanation of these ingredients provided by Brazilian Peel

Glycolic Acid — An alpha hydroxy acid derived from natural sugar cane.
Acai (Euterpe Oleracea Pulp Oil) — Grown wild in the Amazon jungle, the acai berry is rich in vitamins B1, B2, B3, C and E – as well as Omegas 3, 6 and 9; it’s an exceptional natural anti-oxidant that helps to reduce the effects of free radicals as it promotes healthy skin.
Magaldrate — a blend of aluminum hydroxide and magnesium hydroxide that neutralizes acid and draws out impurities.

As you can see, with the exception of the magaldrate, the ingredients are from natural sources. Which explains why the peel is strong enough to work but gentle on the skin - it will not cause redness or irritation. I know I mentioned this in my first post but I cannot stress it enough: I have super sensitive skin. I have used the Brazilian Peel twice and I have experienced no redness, no irritation - Nothing!

Still need a little more information? Take a few minutes to watch this video of an episode of Dr. Oz talk show where the Brazilian Peel is showcased as being an "inexpensive plastic surgery alternative"...


Now it's your turn: What is your opinion of this product? Did you opinion change after watching the video? 

Please feel free to share your thoughts and questions in the comments - we love hearing from you! Stay tuned because we have one last review post coming once we have completed the entire four week treatment.

Disclosure: I received the above products through Sublime Media Connection in exchange for an honest review. In no way was I asked to give a positive review.

Monday, July 23, 2012

AHA Brazilian Peel : Antidote for Aging


Last month I was given the opportunity to receive and review a skin care product that helps "revive" and re-freshen facial skin. The name of the product is: AHA Brazilian Peel - AHA stands for: Advanced Home Actives.

As the name states, this product is a professional strength peel for at home use. This product has been showcased on Dr.Oz and The Doctors for it ease of use and results. The Brazilian Peel contains glycolic acid and acai. The acai is a natural super anti-oxidant from the Amazon rain forest in Brazil.

Inside the box are four applications - which are to be used once a week during a one month period. Here is what one single application looks like:


The applications are in a faux syringe device.  All you do is open the syringe at the top, squeeze both liquids into the palm of your hands, mix the two until they are completely combined (you should feel a slight warming sensation in your hand) then apply mixture to the face as evenly as possible. The peel is to be left on the skin for a total of 10 min. After the time has elapsed, the peel is then rinsed off with cool water.

Here are my findings:

Once the cream has been mixed it is very easy to apply. The peel is transparent, it has no color, and dries rather quickly. According to the box, it states "skin will feel as it is tightening as the product works.."  This is true.  After a few minutes, I could feel a slight tightness to my skin - but it was not an uncomfortable feeling. 

The peel does wash off rather easily, which is nice. In the past I have used peels and masks that are quite difficult to rinse off but the Brazilian Peel dissolves very easily. Once I had removed the peel from my skin, I immediately applied facial moisturizer. My suggestion with this is, if you do this peel in the morning make sure to apply a moisturizer that has UVA/UVB SPF protection. On the other hand, if you do this treatment at night, as I did, then use your regular night cream.

In my opinion, the AHA Brazilian Peel does exactly what it claims on the packaging. It does firm the skin, reducing fine lines, and more importantly, it does not cause redness or irritation - which is important for me as I have very sensitive skin and am prone to breakouts.

The only "con" about the Brazilian Peel I found is that each package only has 4 (four) applications. I wish the packaging included more - at least three months worth! But, that's just my opinion - I am greedy like that when it comes to products that actually work!

Please stay tuned for more  information on this product as there will be an additional two (2)  posts coming in the next few weeks.

For more detailed information about AHA Brazilian Peel please visit their website and their blog - You can easily find more information to any other questions you may have after reading this review.


Disclosure: I received the above products through Sublime Media Connection in exchange for an honest review. In no way was I asked to give a positive review.

Sunday, July 22, 2012

Avoiding Those Common Under Arm Blunders - Part 2


This post is sponsored by Dove® ClearTone™ Deodorant - designed to visibly reduce underarm dark marks and even skin tone.

As promised, here is Part Two of the Avoiding Those Common Under Arm Blunders mini series. In our first post we took a closer look at a few tips to help treat red blemishes that can sometimes appear on our under arm skin. Today we are going to give a few tips on how to treat our under arm skin from getting unsightly dark marks.

So let's get right to it, shall we?


To get rid and prevent dark marks to under arm skin, give these tips a try:

1. Start waxing the under arm area instead of shaving. Why? Waxing is the best choice because it will remove the hair from the root, leaving no dark marks (this is especially recommended for those of us who have dark colored and or coarse hair).  Shaving does not do this. When shaving, the hair is removed however the root stays beneath the skin - which is what causes the skin to have a darker appearance.

2. Treat the area with baking soda. This can be done two ways: Baking soda can be applied directly to freshly washed skin or by making a paste to use when exfoliating the skin. When making a paste simply take a few teaspoons of baking soda add in a few drops of lemon juice. Apply this mixture to under arm skin allowing it to sit on skin for a few minutes, then wash off completely.

3. Treat the skin with a natural bleaching mixture. This is done by mixing a few teaspoons of plain yogurt with a few drops of lime juice. Similar to using baking soda, this mixture is applied to skin leaving it on for at least 20 min. It is recommended to do this treatment before bathing.

4. When washing under arms always use a gentle loofah - this removes dead skin cells.

5. Avoid applying perfume or any type of fragrance to under arm skin. Doing this will cause the skin to darken over time.

6. Use talcum powder on those days where the temperature is extremely hot.

7. Try to wear clothing made of natural fabrics only. These would be cotton, hemp, bamboo even soy fabrics. Wearing natural fabrics allows the clothing to "breathe" which will help avoid chaffing and irritation to the under arms. Wearing other fabrics, such as polyester or poly-cotton, will do exactly the opposite: trap in the heat causing you to sweat more than normal which will cause the fabric to irritate the skin.

Side Note: IMPORTANT: When using any natural home remedy for preventive care, please be patient! Results can vary, and can take time to appear. But, more importantly - don't give up!

And there you have it! Simple treatments that can be done in the comfort of your home. Now,  there should be NO reason why you shouldn't be able to wear those sexy sleeveless tops during the summer months!

Now it's your turn: How do you take care of your under arm skin? Do you have any suggestions about waxing? 

Please share your ideas and comments with us - we love interacting and hearing from our readers!

I was compensated for this post by the Clever Girls Collective.com. All the opinions expressed here are my own.

Friday, July 20, 2012

Avoiding Those Common Under Arm Blunders...Part One


This post is sponsored by Dove® ClearTone™ Deodorant - designed to visibly reduce underarm dark marks and even skin tone.


This summer we have seen the humidity and heat rise to new levels. Here in Gahanna, Oh we had days that the temperature rose above the 100 mark! Now, I am not complaining - trust me I love some hot weather BUT what I don't appreciate is having to wear clothing with any type of sleeves. I can't do it! I just can't!

I know that for some of us (myself included) wearing sleeveless tops is to be avoided at all cost, however, there are ways we can get over this. Yes, you read correctly: There are ways we can definitely keep those unsightly dark marks and red blemishes from appearing on our under arm skin.


To get rid of any red blemishes or bumps under the skin try these tips:

1. Exfoliate under arm skin on a regular basis. Keep in mind this does not have to be done everyday but at least a few times a week should suffice. Exfoliating our under arm skin is recommended because this will remove all the dead skin cells from this area. I have found that the best way to exfoliate is by using a small shower sponge and gently buffing the underarm area right before shaving.

2. If you prefer to remove under arm hair with a razor, make sure to use a generous amount of shaving cream, shower gel or soap. Personally, I tend to use a oatmeal and almond soap for my skin and this has helped a lot! Whichever you decide to use, rule of thumb is to provide under arm skin with a think layer of product creating a "cushion" that will protect skin from razor blades.

3. Always try to use NEW razors when possible. Since the blades are sharper, they will glide across the skin much easier reducing any possibility for irritation, as well as avoiding  having to run the razor over skin more than once.

4. IMPORTANT: Always glide the razor blades in the SAME direction of the hair growth. I know, most people would say the opposite but please trust me on this one! If you do glide razor in the opposite direction, you will be causing ingrown hairs to appear - this is exactly what you need to avoid doing!

Now for the last step, if you DO have any red bumps do the following step BEFORE applying Dove Clear Tone Deodorant.

5. After shaving under arms, dry skin completely then apply a thin layer of hydrocortisone cream. This will help calm any irritation and itching that you may have. Once this dries, apply a layer of Dove Clear Tone Deodorant.

For those of you who DO NOT have any blemishes under your arms, after completing step #4, apply a layer of Dove Clear Tone Deodorant and allow this to dry before putting your top on.


Now it's your turn: How do you typically keep your under arm area blemish free? Have you seen the new Dove Clear Tone Deodorant? Which one do you use?

Please share your thoughts with us as we will be continuing this conversation in a second post where we will be giving tips on how to treat and avoid getting dark marks on our under arm skin.


I was compensated for this post by the Clever Girls Collective.com. All the opinions expressed here are my own.

Wednesday, July 18, 2012

Pampering Your Feet with Nature's Sleep


When was the last time you went to a spa to get a pedicure? If I were to answer this question, my response would be a few weeks ago. Yes, I am one of those people who love to get pampered - especially my feet.

I feel as though getting a pedicure is essential part of my personal beauty skin care routine. Although my offices are located in the comfort of my home, I do tend to spend a lot of time standing while preparing orders for my clients. Most days tend to move forward without a hitch, but then there are those few days in between when the only thing my body craves is to sit down and put my feet up.

When this happens I just grab the phone and call the spa to book an appointment. However, as of lately my time has been so limited that I have decided to pamper my feet at home.

So how do I take care of my feet? Here is what I like to do:

Sitting on the edge of the bathtub, I scatter a few teaspoons of bath salt , then fill the tub with just enough hot water to cover my entire foot. Then I just let my feet soak in the water. I like to take some reading material with me so as of lately I have been taking my IPAD with me so I can read the articles in my fashion magazines.

After about 10-15 min. I rub my feet in the water, wash them with shower gel using a plain exfoliating hand glove, pat them dry - then scrub my feet for a second time using my homemade honey almond foot scrub. The honey almond scrub is very effective in getting the dead skin off my heels while leaving my feet soft as silk!

But, the BEST part of my foot treatment: slipping my feet into my Nature's Sleep opened toe slippers! I have to admit that once my feet touch the slippers it is heavenly! These slippers are so soft, when walking in them it feels as if you are walking on pillows.

I really do enjoy wearing my Nature's Sleep slippers. These slippers conform to the shape of my feet making them so very comfortable to walk around in. Did I mention that these slippers are easy to maintain clean? The slippers can either be washed in the machine or just spot cleaned, but for the most part I just put them in the washer. The one I can't tolerate are dirty nasty looking slippers!

So, as you can see, going to the spa to get pampered is not always needed. All you really need is a good foot scrub and a pair of Nature's Sleep slippers for your feet - trust me, once you slip into a pair of these slippers your feet will immediately feel the difference.

Good news is, the wonderful people at Nature's Sleep are allowing me the chance to giveaway a pair of their opened-toe memory foam slippers to one of YOU! Just complete a few easy entries in this rafflecopter for your chance to win your very own pair of Nature's Sleep slippers.

The giveaway begins today, July 18 and will end on August 1 - this is opened to US only. Good Luck to everyone who enters!

a Rafflecopter giveaway

Friday, June 29, 2012

Anti-Aging Skin Care with #EclosBeauty

This post brought to you by éclos Skin Care. All opinions are 100% mine.

Woman of all ages are trying their best to appear years younger than their chronological age. In some cases, the first choice some women make is to undergo a facelift, having fillers injected in their facial wrinkles, or even getting injected with botox. Whatever the choice may be, the bottom line is: No one wants to look their age!

As with almost every other health issue, the answers for healthier, younger looking skin can be found in nature itself. We all know that consuming more fruits and veggies will help skin cells replenish themselves thus helping us feel more energetic and youthful. This is very true however some of us, myself included, would like to “speed” up the process, in hopes of experiencing almost instant results.

When I think of how I can do this, one thought immediately comes to mind: skin creams. Why? The answer to this is very simple: skin that is moisturized does not appear flaky, dull, or wrinkly. Moisturized skin is soft, supple and has a youthful glow to it. Knowing this in conjunction with knowing that fruits are a great source of vitamins and antioxidants, why not combine these two together?

I have recently found out that there is a company called éclos Skin Care uses “plant extracts, vitamins and antioxidants combined with Apple Stem Cell technology” in their skin care line which “helps minimize the appearance of fine lines, wrinkles and tired skin.” I must admit, I have not personally heard of other companies that have done this. An added feature that especially caught my attention was that eclos products are free from synthetic fragrances, sulfates, synthetic dyes and petrochemicals which are very harsh ingredients when used on our skin.

We want younger, fresher looking skin, not blotchy skin with breakouts!

éclos Skin Care currently has a beauty kit available that provides all the products that are needed to take care of the skin.

Take a look at the list of products that come in the beauty kit:
Eclos_StarterKit.jpg

• Facial Cleanser Skin Prep -  used to purify pores and primes skin for treatment
• Cellular Activator Face Serum -  regenerates skin cells and helps skin resist further damage
• Moisture Therapy Regenerative Cream -  brightens dull skin and reduces lines and wrinkles
• Restorative Eye Cream -  firms delicate skin
• Instant Radiance Facial Scrub -  removes dull, dry skin cells
• Skin Renewal Clay Mask -   absorbs dirt and impurities in skin and tightens pores
• éclos Terry Cloth Headband

Where can you find this éclos Skin Care beauty kit?

éclos Skin Care can be found online or in most local retail stores which is great because that means that most of us will be able to purchase and try éclos Skin Care without having to schedule an appointment with a surgeon, without feeling the prick of a needle, and without spending a fortune!

For more detailed information on their beauty products, please visit éclos Skin Care
Visit Sponsor's Site

Monday, May 28, 2012

Style United: Your very own personalized virtual makeover

Many of us women at one time or another has struggled with finding the perfect types of fashion apparel, and skin care routine that works best for our individual style. Well, I am glad to say that there is no longer a need to have these worries or insecurities!

SheSpeaksbutton

Style United has all the answers to help us solve any type of styling issues we have ever had to encounter... Sounds fantastic, doesn’t it?

Indeed it is. Here are the many reasons why:

For starters, becoming a member of Style United is easier than you think. Plug in your main contact information then you are all set to start personalizing your style account. What does this involve? It involves two things: a few minutes of your undivided attention and honesty. Why honesty? You will need to complete a variety of questions on your hair type, figure type, skin type and other questions that will be about your individual preference which is needed in order to obtain the BEST possible advice for your overall – Style360 makeover.

The questions are very direct on specific topics, which are: fashion focus, mad for makeup, skin deep, and hair affair. As you are going through these four main sections of the Virtual Makeover Diagnostic Tool, personalized advice is given to you immediately depending on your specific response. This is a great way to see where one can improve their style, makeup tips, skin and hair care.

In addition, if while you are moving through the sections you end up having specific questions of your own, the site has a Style 911 tab where you can submit your questions and concerns. Now, if you are in need of a faster response, then there is a toll free number that can be used instead. All the necessary help you need – right at your fingertips!

Two other main facets that Style United  has to offer its members are the sections under Tips & Trends and News & Offers. I personally enjoy these sections the most! I like having the option of searching through the Tips & Trends tab to browse around and see what the latest trend ideas are, the editor’s picks and how I can customize them to suit my individual style.

Over all, becoming a member to Style United is definitely worth the time and effort of responding to a few personal questions. But, of course there are other advantages to joining as well.

If you decide to join Style United now, you will be giving yourself a chance to win their New View, New You Giveaway.  Two winners will be selected to win a $500 gift card that will allow the winners to go on a shopping spree at Macy’s or Nordstrom! It cannot get better than that!

It’s the perfect deal: Join Style United: experience the Style 360 for your very own personalized makeover experience then enter the giveaway for a chance to put your new style advice into effect ~ that’s a win – win situation if you ask me!

To find out more about the SheSpeaks StyleUnited: New View, New You Program, visit www.shespeaks.com/styleunited  for all the juicy details.

Take it from me, I joined Style United and have never looked back. I have all the information needed to make the perfect style choices to fit my individual taste…I truly adore this site, and I know you will too!


Disclosure:  As an active member and blogger of the shespeaks community I was given the opportunity to join the Style United Beauty and Fashion program. This is my personal post  for this program; as such I will receive a complimentary beauty gift provided by P&G for my participation in this campaign. However, ALL opinions stated in this post are 100% MY VERY OWN.


Sunday, May 27, 2012

The Powers of adding a Exfoliating Cleanser to Your Skin Care Routine

Over the years we have been schooled on many different steps that need to be added to our skin care routine. Some of these steps are often overlooked, one in specific, exfoliating our skin.

You may be thinking, "Why is exfoliating such a big deal, anyway?"... Many woman have, including myself, have thought like this once or twice. But, guess what?

Exfoliating is a M.U.S.T.     Here are the reasons why:

1. The instant benefit: Immediately after exfoliating your skin will glow, feel silky smooth, and soft.
2. Exfoliating keep pores "unclogged" which will help with avoiding blackheads and pimples from surfacing.
3. Exfoliating removes dead skin cells, while reducing the appearance of fine lines.
4. Exfoliating helps keep your skin clean. Clean skin will continue to look younger and more subtle as you age.

Now that we know the BENEFITS. how often should we exfoliate?

Dry skin: A minimum of once a week to avoid irritation to dry skin.
Oily skin: Using a gentle exfoliate brand - should be used once a day. (I have oily skin and am prone to breakouts - I use a gentle exfoliate twice a day.) 
Normal - Combination skin: A minimum of twice a week.

Which brands should you use?

There is one suggestion I can make. I have recently fallen in love with SIBU Beauty Exfoliating Facial Cleanser.
SIBU Beauty - Exfoliating Facial Cleanser

I first heard about it while watching Dr. Oz. He featured the SIBU Beauty brand not too long ago. On the show they talked about one of the main ingredients infused in SIBU Beauty which is sea buckthorn berry. This ingredient contains over 190 bioactive compounds, including the elusive Omega 7 (a rare and vital nutrient necessary for healthy skin).

I have oily skin, so I use a very small amount  in the morning and at night before going to bed. Since I started using it I can definitely see the results. Which is the main reason why I jumped on the chance to share this with all of our readers.

Now it's your turn: You too can have chance to get your very own SIBU Beauty Exfoliating Facial Cleanser at 75% off! These cleansers retail for $18, but your price is only $5! plus there is FREE SHIPPING...

PS. Don't forget to come back and let us know how the SIBU Beauty has ranked in your beauty skin care regimen. We love to hear back from our readers!