Showing posts with label braid. Show all posts

Thursday, January 14, 2016

Quick Post Gym Hairstyles for Work + Fun


Quick Post Gym Hairstyles for Work and Fun - The Daily Fashion and Beauty News


Quick Post-Gym Hairstyles for Work & Fun
Date night, work or last minute plans? Go from the gym to glam with these fast hair ideas


In last week's article I shared a few simple ways you can create a successful personal fitness program, if you missed it - click here to read the full article. 

Of the many challenges that come from working out, one of the most popular is how to style our hair post-gym. Regardless of what time of day (or night) you choose to work out, the following hair ideas shared by Fernando Salas, creator of White Sands Haircare, will certainly give you fast hair ideas to go from the gym to a number of after workout plans like work, a date or even just a lazy weekend at home. 


1. Going from the Gym to Last Minute Plans - Do a 3 Minute Blowout
Spray a hairspray like White Sands Infinity ($22) to soak up extra oils and create lift at the roots. Quickly use your dryer and direct the heat only at your hairline to dry up the most visible, sweaty areas. Flip your head over and dry hair upside down. When you come back up, you will have volume while also refreshening tresses. Spray your brush with perfume and run through your hair to finish.

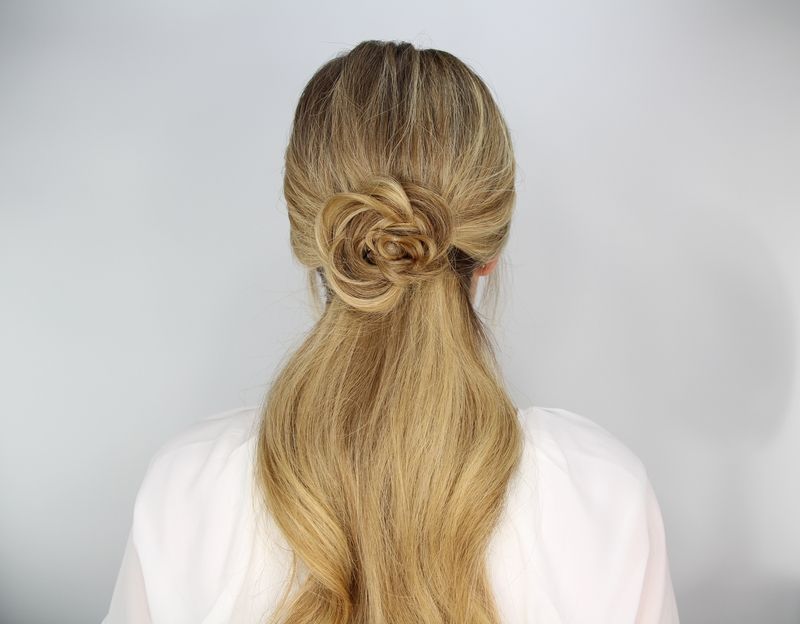
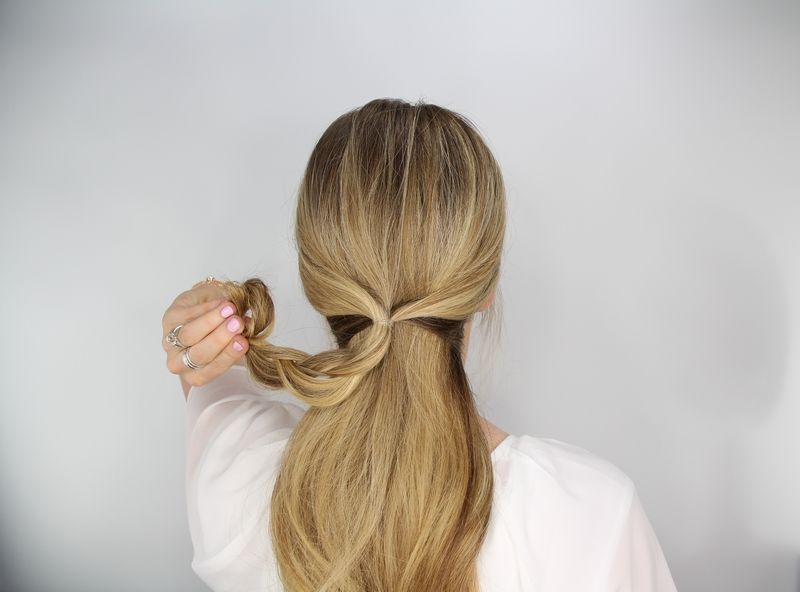
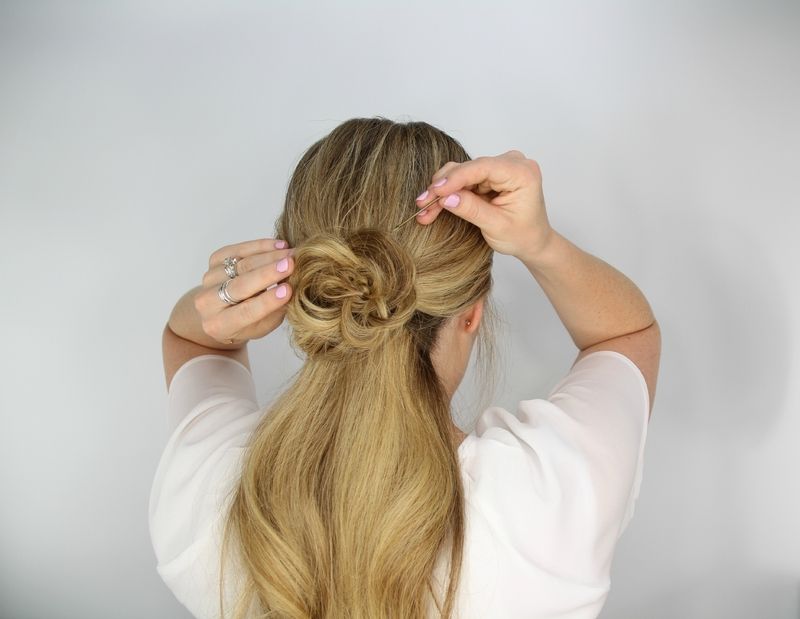
2. Going from the Gym to Date Night - Do a Post Workout Chignon
Start by tousling hair with a texture spray like White Sands UnderCover Styling Spray ($21). Loosely pull hair back into a low pony tail. Using bobby pins, pin a section of hair from the middle of the ponytail an inch or two above the hair tie. Then, use hair pins to pin the remaining lengths in place to complete the look. "Remember, it doesn't have to look perfect. The more creative and the more texture the better," explains Salas.

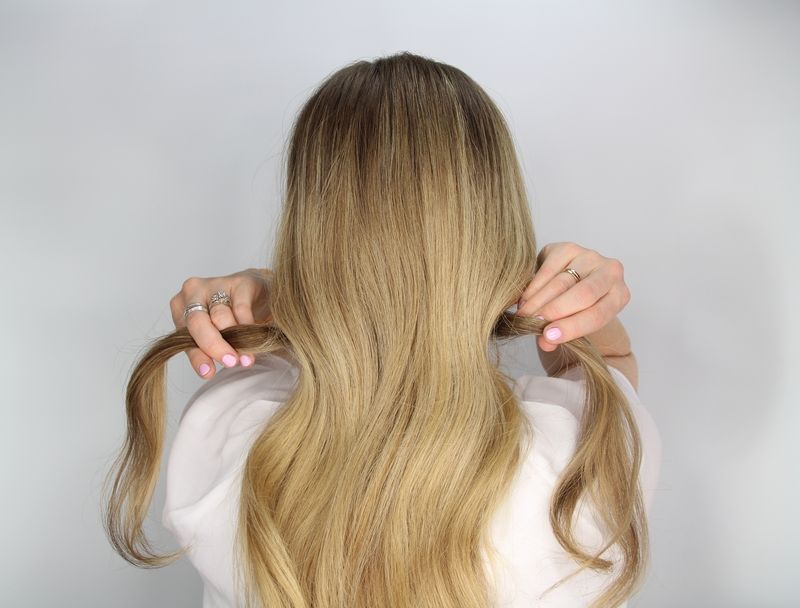
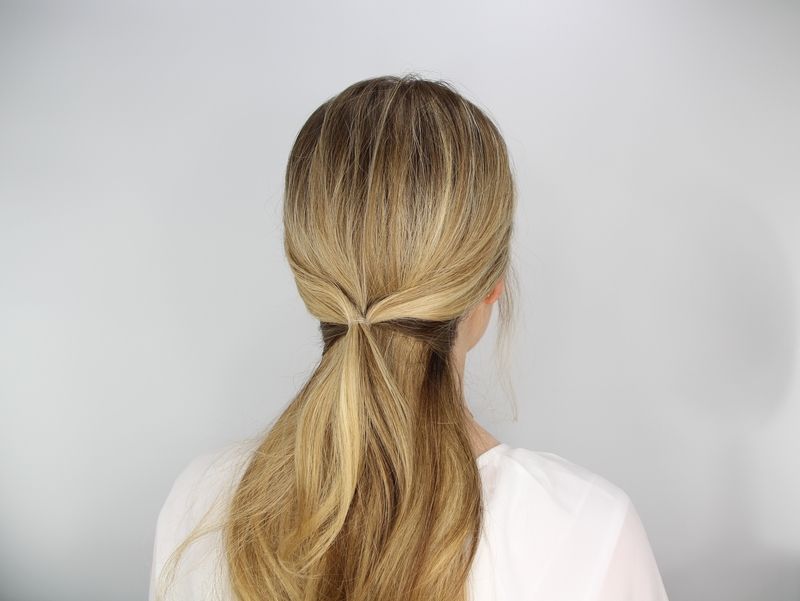
3. Going from the Gym to Work - Do a Classic Ponytail
"I've noticed that a beautiful classic ponytail is underutilized," says Salas. Using a light weight paste like White Sands Smudge Texture Crème ($16), smooth hair back into a shiny sleek, pony and secure in the middle of the head below the crown and above the nape. Wrap a small piece of hair around the band to dress it up and secure the ends with a bobby pin.

4. Going from the Gym to Cocktails with the Girls - Do a High Bun
There are so many different bun makers out there with various foam shapes to choose from. It has never been easier to make one in seconds. You can even cut the toe area off of a sock and roll the remaining part into a circular piece to use. In seconds you will have a clean polished style, that is still fun and flirty. Seal it with a shine spray like White Sands Porosity ($19.40) to disguise oily hair.

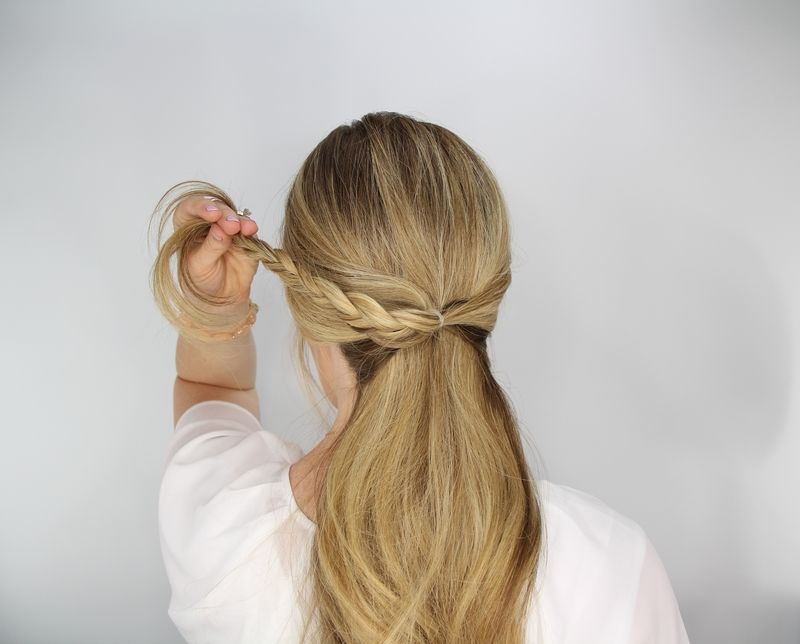
5. Going from the Gym to a Relaxed Weekend - Do a Braid
No matter where life takes you, opting for a braided hairstyle can be the easiest way to get pretty hair without a lot of prep. Wear your braid of choice while working out and let this style act as a curling iron. Once you are done at the gym, undo to reveal heatless waves perfect for a casual weekend. 


Which post gym hairstyle are you most likely to try? 

Monday, August 17, 2015

Back to School: The Rosette Embellished Ponytail Tutorial


Today's easy diy hair tutorial is perfect everyone, especially those of you who are going back to school.  

According to  Latest-Hairstyles.com contributor Melissa Cook, "this rosette embellished ponytail takes the same amount of time as a regular ponytail and is ten times cuter than the average pony look." 

What You Need:

– brush
– two clear elastic bands
– four to five bobby pins
– medium hold hairspray

The Rosette Embellished Ponytail Tutorial:


Step 1
Begin by brushing through the hair to remove any tangles and part the hair in the preferred spot. Separate off small sections of hair on each side of the head.

Step 2
Bring the two sections to the back of the head and over the rest of the hair, then tie it together with an elastic band.

Step 3
Now braid this small ponytail section into a basic three-strand braid and tie off the end with a second elastic band.

Step 4
Roll the braid up and towards towards the elastic band at the top, creating a rosette shape.

Step 5
Pin down the edges of the rosette with four to five bobby pins, making sure they stay hidden underneath.

Step 6
Spray the style with a medium hold hairspray and you are ready to go!


Can you see yourself recreating this rosette embellished ponytail?  

Tuesday, March 3, 2015

Sultry Hair How To: The Snake Braid in 8 Easy Steps

Sultry Hair How To: The Snake Braid in 8 Easy Steps 


Sultry Hair How To: The Snake Braid in 8 Easy Steps - The Daily Fashion and Beauty News


We've all experienced it. Those mornings when we wake up late pressed for time. Running around like a chicken with her head cut off, trying our best to get out of the house looking somewhat presentable.  If you're nodding your head, you know exactly what I am talking about. 

In an effort to make your morning routine a little easier, here is a no fuss quick hair tutorial created by Jennie Kay, guest contributor for Latest-Hairstyles.com . 

You may want to bookmark this one, or better yet  pin it to your "beauty" pinterest board as it will certainly come in handy the next time you sleep in - or the next time you just need to hit the snooze button a few times.  Don't worry I won't tell ;) 


Sultry Hair How To: The Snake Braid in 8 Easy Steps: 


The Snake Braid in 8 Easy Steps - The Daily Fashion and Beauty News
1. Create a large diagonal forward section of hair behind your ear.


2. Split the section into three equal subsections. Apply a bit of pomade to your hand (about half the size of a dime) and smooth out each section. This will help make a smooth, clean braid. Begin braiding (a basic, three-strand braid) this section, keeping medium tension on the braid. You do not want this braid too tight or too loose.


3. Braid almost all the way down to the ends of your hair, leaving one to two inches left below where you stop the braid.


4. Take two of the sections and combine them to make one larger section (you will now only have two sections, one small and one large).


5. Take the smaller section and carefully slide it up the braid.


6. Keep sliding the smaller section up to the top of the braid.


7. Now slide the section back down to create a looser “s” pattern braid.


8. Wrap the snake braid around the back of your head and pin in place. Spray with a medium hold hairspray to add extra hold and tame any flyaways.


*TIP* Lift a small section of hair up and pin your snake braid below it. Drop the hair down so that it conceals where you pinned the braid in place.


{photo tutorial courtesy of  Jenny Kay and Latest-Hairstyles.com}