Showing posts with label tutorial. Show all posts

Monday, February 22, 2016

Hair Tutorials: 7 Incredibly Chic Ways to Wear Bobby Pins

Hair Tutorials: 7 Incredibly Chic Ways to Wear Bobby Pins


Hair Tutorials: 7 Incredibly Chic Ways to Wear Bobby Pins - The Daily Fashion and Beauty News


Happy Monday Gorgeous! 

It's the beginning of a new week and what better way to get it started then by having seven different hair tutorials?  

Thanks to Latest-Hairstyles.com and Wendy Rose Gould, today's hair tutorial post will definitely come in handy this week when you find yourself lacking a little hairstyle inspo. 

According to Wendy, "Bobby pins sort of get the short end of the stick. I mean, they’re super utilitarian, obviously, but pretty much every single tutorial out there tells you they should be tucked away, hidden from the world and never to be seen by a single soul."

"Of course, there’s a time and place when you don’t want your bobby pins to show, but today we’re here to set the bobby pin free. We came up with some bobby pin inspiration for you and have given a how-to for each. If you’re feeling even more playful, try using brightly colored or metallic bobby pins as you experiment with these incredibly chic ways to wear bobby pins."

#1 The Half-Up Bobby Pin Nest


How To: After teasing your hair at the crown and gently combing it out, pull back half of your hair to create a half-up hairdo. Instead of securing hair with an elastic, though, twist it twice to the right and then begin inserting bobby pins to secure. Don’t worry about being strategic or uniform or symmetrical. Instead, create a messy nest of bobby pins. Not only will your hair be very secure, but it’ll look cool. The more bobby pins and the more haphazard their placement, the more “on purpose” it will look.

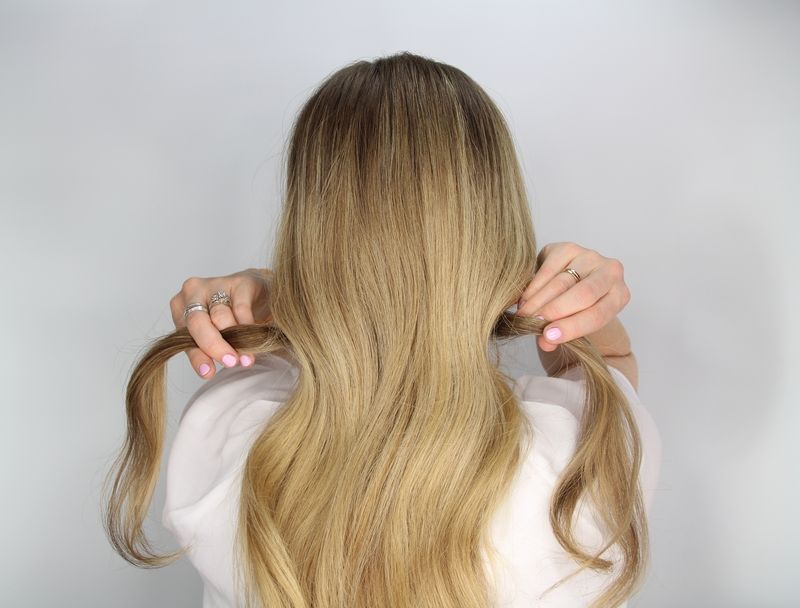
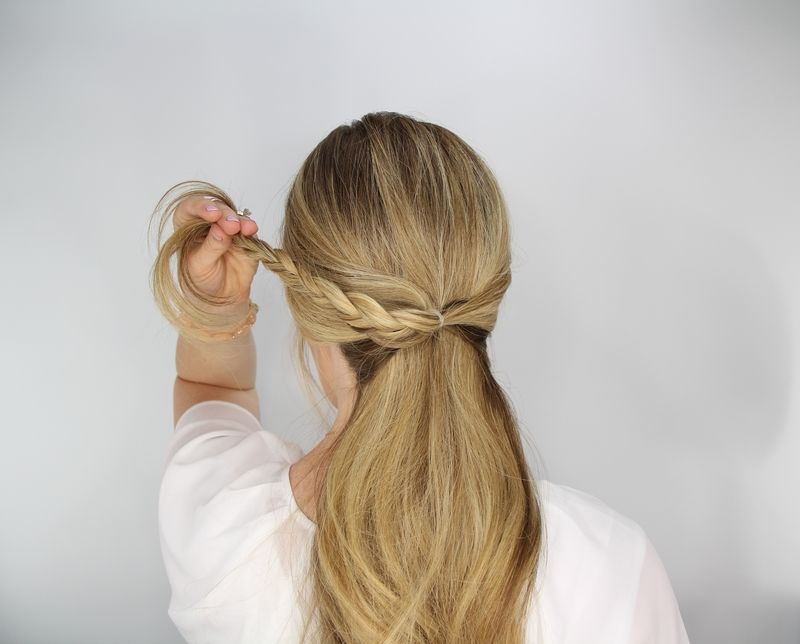
#2 The Half Up Braided and Bobbied


How To: Create two small-to-medium braids on either side of your head. Pull them to the back until they meet and then insert four criss-crossed bobby pins. For an additional touch, and so people know you’re not ashamed of your bobby pin game, insert three horizontal bobby pins above the braids at the center of your head.

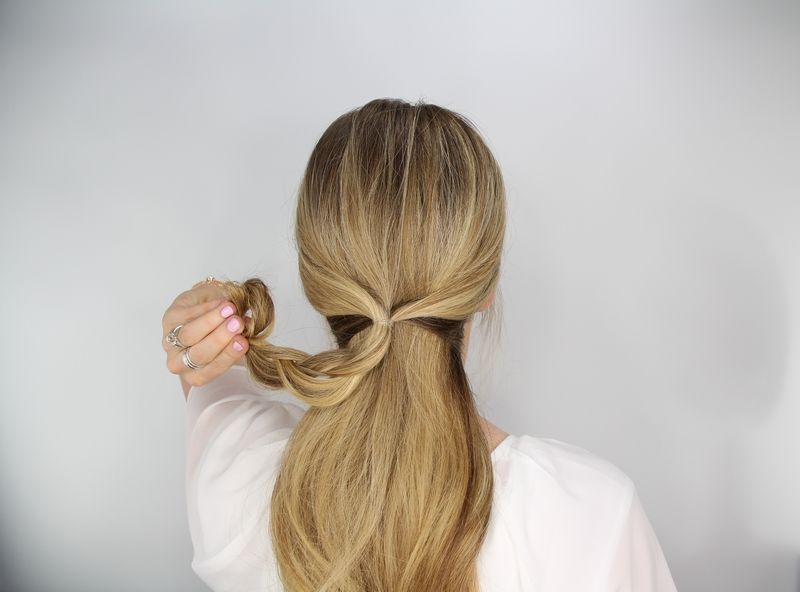
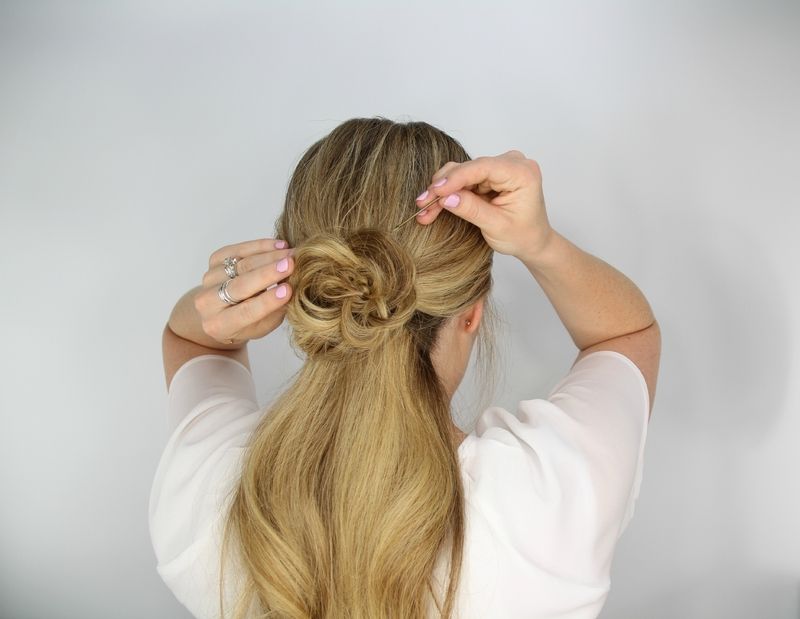
#3 The Messy Bun Meets Bobby


How To: Gather your hair near the crown of your head as if you’re going to put it in a messy ponytail. Begin wrapping it around itself, then secure the entire bun with a clear elastic. Keep your bun very loose, very casual and very undone. From there, add three sets of two bobby pins around the bun.

#4 The No Reason Zigzag


How To: This one’s great because the bobby pins serve no purpose other than to look pretty. Just above your ear, insert two diagonal bobby pins. From there, create a zigzag by adding two additional bobby pins on top and then two below.

#5 The Super Side Swept Lattice


How To: Create a very deep side part, pulling a large portion of your hair to one side of your face. Insert two bobby pins point away from your face. From there, fold over a small section of the pulled aside hair and insert two addition bobby pins (this time toward your face) to keep the fold in place. Repeat, this time pulling hair from the front portion of your pulled aside hair and folding it over. Insert two more bobby pins to keep it in place, again with bobby pins pointing away from your face. Repeat once more on the other side of the pulled aside section, bobby pins pointing toward your face again. Don’t get too caught up in making this look perfect or the same as the image featured here. Just keep folding sections of the hair back and forth and securing with alternating bobby pins to create a lattice.
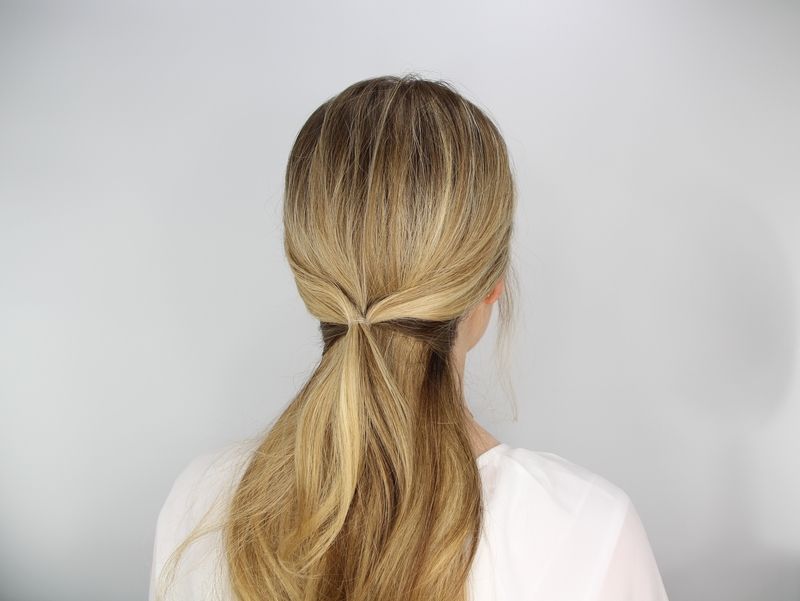
#6 The Covered Pony


How To: Divide your hair into three sections, with the largest section in the middle and two smaller sections on either side. Gather the middle section into a low ponytail and secure with a clear elastic. Drag one section of hair over the top of the ponytail and wrap it around, securing with a bobby pin. Repeat on the other side. On either both sides or one side (your choice), insert four fanned out bobby pins.

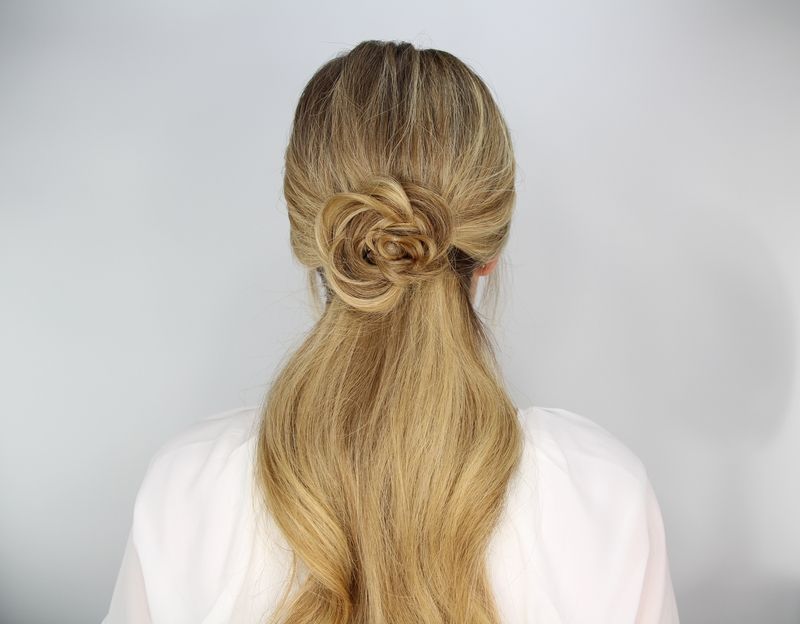
#7 The Pinned Rosette


How To: Gather a small section of your hair above your ear and gently twist the hair around itself to create a spiral. Place the rosette flat against your head and insert two criss-crossed bobby pins.


Now it's your turn: Which of these chic ways to wear bobby pins will you try to recreate this week?  Let me know in the comments - I'm looking forward to hearing from you! 

Thursday, November 19, 2015

The Ultimate Katniss Hair + Makeup Tutorial #MockingjayPart2


Happy Thursday Beautiful! 

Today's article is a two-for-one beauty tutorial dedicated to everyone who has been patiently waiting for the release of Mockingjay Part 2. 

I for one, am super excited to go and watch the movie this weekend. It's been a few months since the last time my husband and I have gone to the theater, so this weekend will be the perfect time to go. 

In honor of Mockingjay Part 2, Wendy Rose Gould (beauty expert for Latest-Hairstyles.com) has recreated the hair + makeup from the movie. 

So, if you were searching for hair and makeup inspiration for this weekend, look no further....everything you need to know continues below.  


The Ultimate Katniss Braid & Makeup Tutorial
[Just in Time for Mockingjay Part 2!]
Re-Create The Hair
"This is a relatively straightforward hairstyle. But to recreate the Katniss braid, you may want to get some hair extensions," explains Wendy Rose Gould, beauty expert for hair tutorial and advice site www.Latest-Hairstyles.com

"We’re using Effortless Exensions’ Sip On Hair, which is temporary and easy to work with. If you don’t need to add length, skip to step three."

Step 1: Apply Serum
Prep your hair by apply hair serum. This will tame frizz, make your hair easier to manage, and will also help create the same kind of shine that a lot of faux hair pieces have, thereby allowing it to blend a little easier. We’re using Cureology Smoothing Anti-Frizz Hair Serum.
Step 2: Apply Extensions
This step will vary depending on what kind of extensions you’re adding.
Step 3: Move Hair
Shift all your hair to one side of your head.
Step 4: Part Hair
Part your hair down the center.
Step 5: Fishtail Braid
Now for the most arduous part of this hair tutorial: creating your fishtail braid (and it’s not even difficult). To do this, divide your hair into two sections, then drag an outer piece of hair from one section over to the other section. Pull tight, then repeat on the opposite side. Continue pulling tight as your braid the length of your hair, securing with a clear elastic on the end. Make sure all your hair is draped to one side of your head (secure with bobby pins if necessary), and then pull out sections of hair for that “piece-y,” and lived in look. You can use a texturizer or more serum to get those strands. Also twist each of these pieces to keep them separated.

Re-Create The Makeup: 


"In three words, Katniss’ makeup is natural, dewy, and bronzed," says Wendy Rose Gould, beauty expert for hair tutorial and advice site www.Latest-Hairstyles.com.
To achieve this, I first applied Etude House Precious Mineral BB Cream to my skin. I then applied the bronzer in Paula Choice’s Blush it On Contour Palette with a bushy brush onto the apples of my cheeks. I also applied the bronzer to my forehead and chin, slowly building color. From the same palette and with the same brush, I added highlighter to the applies of my cheeks and the center of my forehead, then followed up with the darkest blush to add color onto my cheeks.
For my eyes, I used Urban Decay Naked Basics Palette. I filled in my brows with Faint, then applied Naked 2 across my eyelids. I used Faint in my eye creases to create dimension, and blended out with W.O.S. The colors you choose for this eye look will depend on my coloring. In general, stick with a matte brown that’s darker than your skin for the eyelids, followed by a slightly darker brown in the creases. The blending color should match the color of your skin.
I also applied tre’StiQue’s Swiss Chocolate Line, Sharpen & Smudge Eye Pencil to my upper lash line and blended with an angled eyeliner brush, then threw on some Sigma Sinuosity mascara. For lips, I dabbed on a pinkish nude lacquer and blended it into my lips with my pinky.

If you like, watch the video tutorial HERE

Are you excited to see #MockingjayPart2 tomorrow? Will you be recreating Katniss' hair and makeup?  If you do, please tag us on your photos so we can share them too! 
Instagram: @latinflavadesigns
Twitter: @latncookndiva

Tuesday, October 6, 2015

Pretty Yet Spooky – Easy Halloween Nail Tutorial

Just in time for Halloween! A easy pretty yet spooky Halloween nail tutorial by my all time favorite beauty brand: Julep. 

Regardless of what you plan on dressing as this Halloween, these nails will certainly add a pretty spooky touch. 


This new Halloween nail art tutorial from Julep uses colors from their Happy Halloween Welcome Box. Here are the steps to this easy orange-and-black mani:


1. Paint one coat of orange 2/3 of the way up your nail. Let dry.


2. Using a striping tool (or a toothpick!) to polish on black points.


3. Polish the outline of the points with one coat of black polish.


4. Add a top coat and you’re done!


Interested in receiving your very own Halloween welcome box?  

Join Maven and get the 4-piece Pretty Spooky Welcome Box FREE ($50+ value) - just pay $2.99 shipping with code BOO. Want an even better deal? Pre-pay for your first three months of Maven and get the Welcome Box and shipping FREE. 

Either way, you are going to LOVE being a Maven - especially because of all the perks: 

  • Julep Maven is affordable. Every month you get more than $40 of full-size products for just $24.99 per month (tip - prepay for three months at a time and save $15).
  • Julep Maven is the only customizable box of full-size, limited-run nail colors and beauty innovations. That means no surprises, no dupes or colors you don't like. You can see what is in your box each month and have the option of swapping out colors/products you already have or don't want.
  • Julep Mavens get 20% off all single product purchases, free shipping, early access to secret sales. If you are passionate about your polish, that adds up to some amazing savings!
Waiting are you waiting for? Get your Pretty Spooky Welcome Box - You deserve it! 


*This post contains affiliate links and I will be compensated if you make a purchase after clicking on my links. As always your support is deeply appreciated - I am forever grateful for all that you do to help keep this blog online. Thank you! 

Tuesday, September 15, 2015

Ombre Nail Tutorial + Free Welcome Box Offer

The Daily Fashion and Beauty News


I love going to the nail salon to get a weekly manicure. It's one of those small treats that really helps make me feel  "put together". 

On those rare occasions when I can't make it to the salon, then I typically just paint my nails using of the many Julep nail colors I have in my collection. When I do take the time to give myself a manicure, I always make a point of creating effortless simple nail art. 

One of the easiest nail art designs to create are ombre nails. 

True enough, ombre isn’t a new trend–we’ve been seeing it for years, on everything from clothing to nail art to hair. And yet, its popularity still isn’t fading! 

Recently, Julep shared a new ombre nail art tutorial that uses colors from their 'Fall Into Ombre' Welcome Box - FREE when you join Julep Maven.

Let's get started with this easy quick Ombre Nail Tutorial: 


1. Choose three polishes that blend well together, spanning from dark to light. Not sure what to pick? You can’t go wrong with a deep, opaque color, a lighter shade of the same color, and white. Polish your nails with your darkest color. Allow them to dry.

2. Pour two small dollops of your medium and light colors on a smooth surface (like a piece of wax paper). The two dollops together should be about two-thirds the length of your nails. Use a toothpick or orangewood stick to swirl them together slightly so they mix in the middle, forming a gradient.

3. Dip the edge of a cosmetic sponge directly into your dollops of nail polish then align the sponge so that the lightest color is at the tip of your nail. Press the polish onto your nails with the sponge, dabbing and repeating until you achieve the desired effect. This doesn’t have to be precise!

4. Clean up the edges with our polish corrector pen or a thin brush dipped in polish remover. Finish with a top coat. Voilà!

Now, let's move on to the best part of this article ... Your FREE Welcome Box Offer: 

Get the colors used in this look for FREE when you join Julep Maven, the subscription beauty box program. 

As a Julep Maven you’ll receive a box of brand-new, full sized nail color and beauty products each month – and believe me ... you deserve it!
  • Julep Maven is affordable. Every month you get more than $40 of full-size products for just $24.99 per month (tip - prepay for three months at a time and save $15).
  • Julep Maven is the only customizable box of full-size, limited-run nail colors and beauty innovations. That means no surprises, no dupes or colors you don't like. You can see what is in your box each month and have the option of swapping out colors/products you already have or don't want.
  • Julep Mavens get 20% off all single product purchases, free shipping, early access to secret sales. If you are passionate about your polish, that adds up to some amazing savings!

Want an even better deal? Pre-pay for your first three months of Maven and get the Welcome Box and shipping FREE. 

Either way, you are going to LOVE being a Maven (I know I do!). 

So tell me: Are you going to give this ombre nail tutorial a try?  If so, what color nail polish will you chose? 


FTC: Links in this article are affiliate links. If you purchase your free welcome box by using these links, I will receive a small commission which is used to maintain this site and bring you more amazing offers. Thank you for your continued support! 


Monday, August 17, 2015

Back to School: The Rosette Embellished Ponytail Tutorial


Today's easy diy hair tutorial is perfect everyone, especially those of you who are going back to school.  

According to  Latest-Hairstyles.com contributor Melissa Cook, "this rosette embellished ponytail takes the same amount of time as a regular ponytail and is ten times cuter than the average pony look." 

What You Need:

– brush
– two clear elastic bands
– four to five bobby pins
– medium hold hairspray

The Rosette Embellished Ponytail Tutorial:


Step 1
Begin by brushing through the hair to remove any tangles and part the hair in the preferred spot. Separate off small sections of hair on each side of the head.

Step 2
Bring the two sections to the back of the head and over the rest of the hair, then tie it together with an elastic band.

Step 3
Now braid this small ponytail section into a basic three-strand braid and tie off the end with a second elastic band.

Step 4
Roll the braid up and towards towards the elastic band at the top, creating a rosette shape.

Step 5
Pin down the edges of the rosette with four to five bobby pins, making sure they stay hidden underneath.

Step 6
Spray the style with a medium hold hairspray and you are ready to go!


Can you see yourself recreating this rosette embellished ponytail?  

Tuesday, March 3, 2015

Sultry Hair How To: The Snake Braid in 8 Easy Steps

Sultry Hair How To: The Snake Braid in 8 Easy Steps 


Sultry Hair How To: The Snake Braid in 8 Easy Steps - The Daily Fashion and Beauty News


We've all experienced it. Those mornings when we wake up late pressed for time. Running around like a chicken with her head cut off, trying our best to get out of the house looking somewhat presentable.  If you're nodding your head, you know exactly what I am talking about. 

In an effort to make your morning routine a little easier, here is a no fuss quick hair tutorial created by Jennie Kay, guest contributor for Latest-Hairstyles.com . 

You may want to bookmark this one, or better yet  pin it to your "beauty" pinterest board as it will certainly come in handy the next time you sleep in - or the next time you just need to hit the snooze button a few times.  Don't worry I won't tell ;) 


Sultry Hair How To: The Snake Braid in 8 Easy Steps: 


The Snake Braid in 8 Easy Steps - The Daily Fashion and Beauty News
1. Create a large diagonal forward section of hair behind your ear.


2. Split the section into three equal subsections. Apply a bit of pomade to your hand (about half the size of a dime) and smooth out each section. This will help make a smooth, clean braid. Begin braiding (a basic, three-strand braid) this section, keeping medium tension on the braid. You do not want this braid too tight or too loose.


3. Braid almost all the way down to the ends of your hair, leaving one to two inches left below where you stop the braid.


4. Take two of the sections and combine them to make one larger section (you will now only have two sections, one small and one large).


5. Take the smaller section and carefully slide it up the braid.


6. Keep sliding the smaller section up to the top of the braid.


7. Now slide the section back down to create a looser “s” pattern braid.


8. Wrap the snake braid around the back of your head and pin in place. Spray with a medium hold hairspray to add extra hold and tame any flyaways.


*TIP* Lift a small section of hair up and pin your snake braid below it. Drop the hair down so that it conceals where you pinned the braid in place.


{photo tutorial courtesy of  Jenny Kay and Latest-Hairstyles.com}

Thursday, May 2, 2013

Bold and Neutral Makeup {Tutorial}

starlooks march starbox collage


The March 2013 Starlooks Starbox was what you could easily call a "mixed" makeup box. The products received were a beautiful combination of bold and neutral colors - everything you could possibly need to pull off one of the coolest smoky eyes and boldest lip looks for this Spring/Summer season.

Three essential makeup products (sent in the March starbox) you will need are the following:
  • Moisture Rich Lipstick in Flutter  (bold)
  • Eye Shadow Matte (single) in Disarray  (neutral)
  • Lengthening Mascara in Black    (neutral)

starlooks march product swatches

Blue is one of the newest ways to wear a smoky eye. Although shades of blue are considered to be "cool" tones, blue is a color that flatters every skin tone. To pull off this neutral but cool smoky eye do the following steps:

1. Apply a eye primer over the lid and under the bottom lash line
2. Using a small dome brush, apply a yellow/gold eye-shadow beginning at the inner corner stopping at the midpoint of the eye lid
3. With another dome brush, apply disarray to the outer corner of eye, stopping where the yellow/gold shadow begins.
4. Softly blend the colors on top as to "diffuse" any harsh lines
5. Using a small blending brush, apply a light shade of bronzer to the crease and blend
6. Lastly, using a very small angle brush, apply a tiny amount of the yellow/gold shadow to the first half of the bottom lash line; then apply disarray to the other half of bottom lash line making sure to softly blend these shadows under lash line.
7. Top of this smoky eye by applying two (or more!) coats of lengthening mascara in black.

starlooks eye makeup look

The cool neutral makeup is done, now let's move onto the bold portion of this look. In this case the lips will be the focus - as such having smooth lips is an absolute MUST.

The first step to moisturized and smooth lips is to exfoliate using a simple sugar scrub. Apply a small amount of the Starlooks "vanilla" Lip Sugar over lips - using your finger, gently rub sugar into lips in small circular motions. Lastly, tissue off - you should feel the difference immediately.

Next, apply moisture rich lipstick in flutter all over the lips - You can do this by applying lipstick directly onto lips or by using a lip brush.

Here is a glimpse of what this bold and neutral makeup looks like:

full face makeup using starlooks makeup


All the products used in this Bold and Neutral Makeup tutorial can be found in the links that follow:

Now it's YOUR turn: Would you wear this bold and neutral makeup look? Which product from the March Starbox do you like the best? Let us know in the comments!
PS. If you would like to see this bold and neutral makeup tutorial in a video, let us know in the comments!


Disclosure: I received the March Starbox for the purpose of this tutorial and review - all photos and opinions are 100% my own. Please be advised that the links posted in this makeup tutorial are NOT affiliate links. In other words, I DO NOT get compensated if you choose to purchase these items. The product links are ONLY to assist you in the event you are indeed interested in buying these items, or becoming a monthly Starlooks subscriber. For a full detailed disclosure used for this lifestyle website, please refer to our DISCLOSURE page at the top of this post.