Showing posts with label beauty tutorials. Show all posts

Friday, November 13, 2015

Red + Gold Ombre Nail Tutorial

Hello there Gorgeous! 

Can you believe that the month of November is almost over?  I can't. It's crazy how quickly the days go by once Halloween is over. But, there is a silver lining: the Holidays are right around the corner. 

And that's something we all look forward to, amiright? 

So, if you’re starting to feel the holiday vibes, then you’ll want to check out this new nail art tutorial from our close friends at Julep. 

Recently, they shared a gold-and-red ombre nail look that will bump up those festive feelings and get you ready for Turkey Day and beyond.  Best part about it is that this ombre tutorial is so easy, you don’t have to be a nail artist to create this shimmery look.

To begin, this is what you'll need to accomplish these beautiful red + gold ombre nails. 


This nail tutorial uses two polish shades from Julep's new Jingle Bells Welcome Box – which you can get for FREE when you join the Julep beauty box subscription. Once you join, you’ll get a box of on-trend, gorgeous, and good-for-you products delivered to your doorstep every month.  On the other hand, if you’re already a Maven (like I am!), you can snag these colors in Julep's  Very Merry Polish Duo gift set.

Now it's time to get into this easy Red + Gold Ombre Nail Tutorial. 


Red + Gold Ombre Nail Tutorial - The Daily Fashion and Beauty News


To get started, pick a gold and a sparkly red polish (they are using Margot Bombshell and Neely from the Jingle Bells box) and follow these simple steps:

1) Paint one coat of Gold, then let dry completely.
2) Dab a makeup sponge with the red glitter polish
3) Blot the makeup sponge on the tip of the nail to create the ombre effect.

Then, add the top coat, and you’re done!

These red + gold ombre nails are perfect for the upcoming Holidays. You can wear these nails for Thanksgiving dinner or for Christmas - while opening your gifts ;) 

For those of you who may not be all about red and gold, here is another similar ombre nail tutorial we shared a few weeks ago: Galaxy Inspired Ombre Nail Tutorial 


Hopefully this easy to follow ombre nail tutorial inspires you to treat yourself to a little glam this weekend. If you enjoy reading nail tutorials + nail related articles, I invite you to sign up for our weekly newsletter where we promise to only share good stuff with you once a week (typically on Friday evening). 


Subscribe to The Daily weekly newsletter

* indicates required


PS. We are currently in the process of creating a few lifestyle (beauty + fashion + foodie) related eBooks within the next few weeks - if you're getting our newsletter, you'll be among the first to have vip access to each one! 

Friday, October 23, 2015

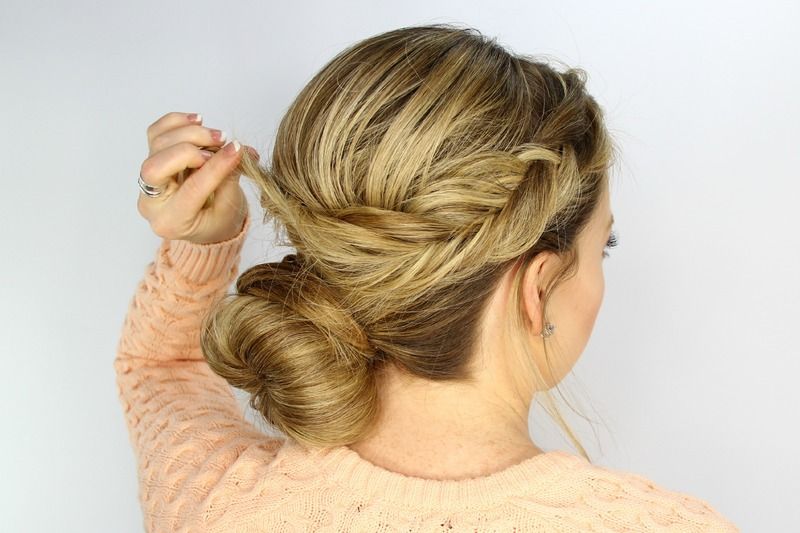
The Perfect Fishtail Wrapped Bun Tutorial


The Perfect Fishtail Wrapped Bun Tutorial - The Daily Fashion and Beauty News


Happy TGIF Beautiful! 

It's been a few weeks since the last time we shared an a easy-to-follow photo hair tutorial, so we figured it was time to post a new one for you to try out this weekend. 

Today's fishtail wrapped bun tutorial has been provided by Melissa Cook, contributor at Latest-Hairstyles.com

According to Melissa,  "Fishtail braids continue to be all the rage right and this hairstyle features two of them. This fishtail wrapped updo is quick and easy once you get the braiding part down, and the perfect hairstyle to keep in your beauty repertoire. This look is both trendy and chic, and luckily it looks trickier than it actually is to create!"

Without further adieu, let's get into the tutorial. 


The Perfect Fishtail Wrapped Bun Tutorial

What You Need:


  • 2 alligator clips
  • 4 elastic bands
  • 1 donut bun
  • 3-6 hair pins
  • hairspray

Step 1
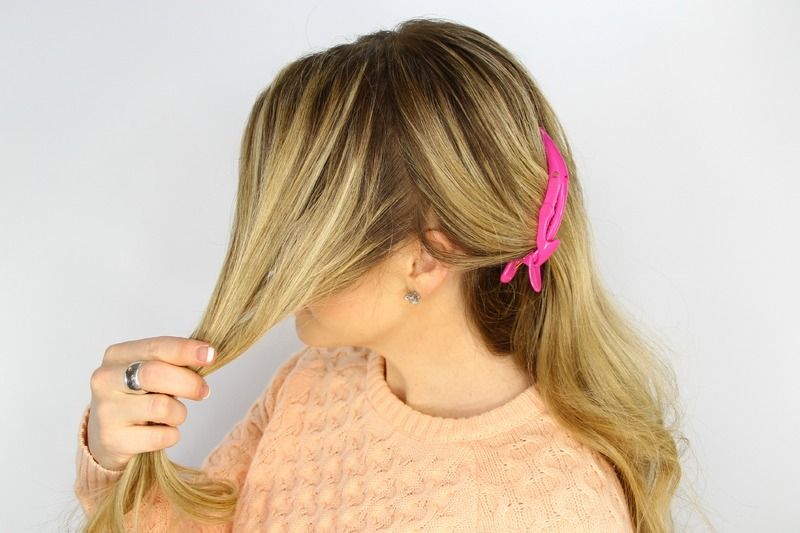
With a part on the right side, separate off a portion of hair from the part down to the left ear. Clip off the back portion of hair with an alligator clip.


Step 2
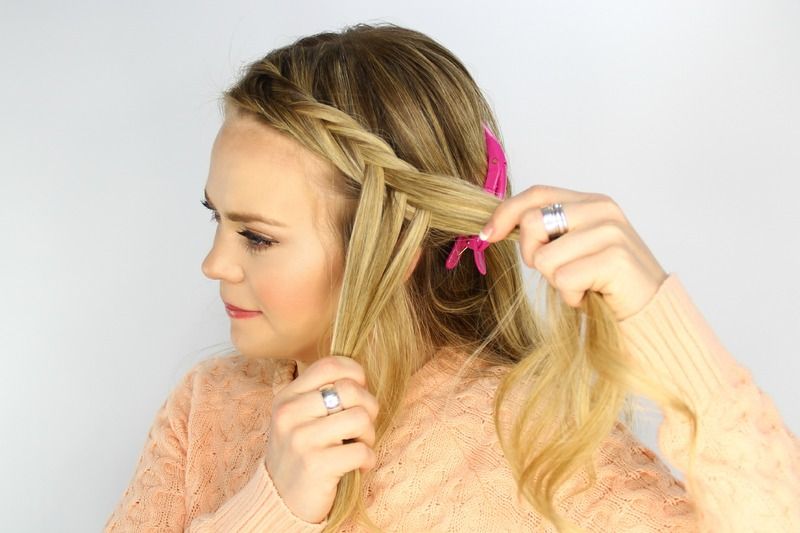
Pick up a section of hair near the part and begin a fishtail French braid. This is done by dividing the section into two halves and crossing small sections of hair underneath to the opposite side while incorporating hair into the braid each time.


Step 3
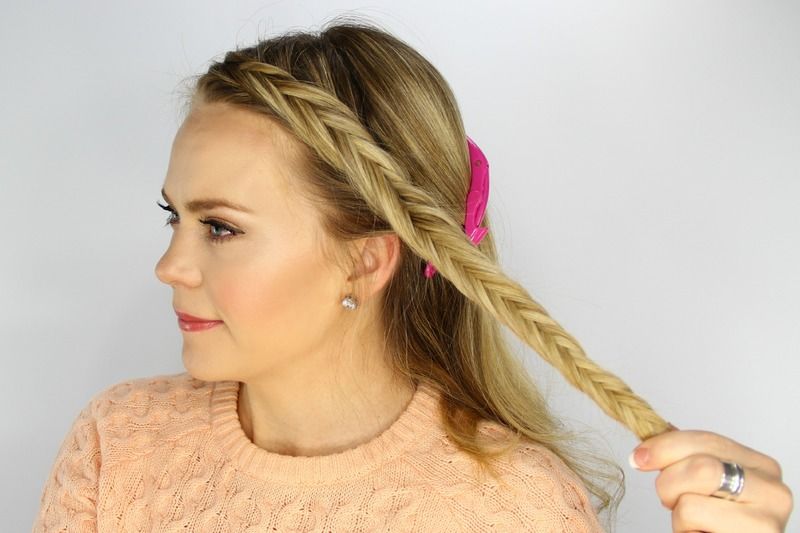
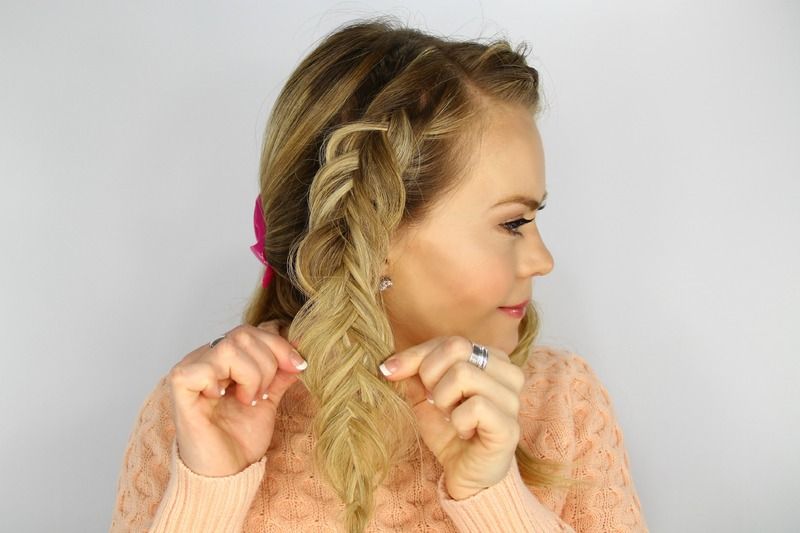
When all of the hair is brought into the braid, finish braiding the section down into a regular fishtail braid.


Step 4
Gently pull on the edges of the braid to loosen and create a fuller braid. Tie off the end with a clear elastic band.


Step 5
Repeat the previous steps creating another braid on the right side of the head.


Step 6
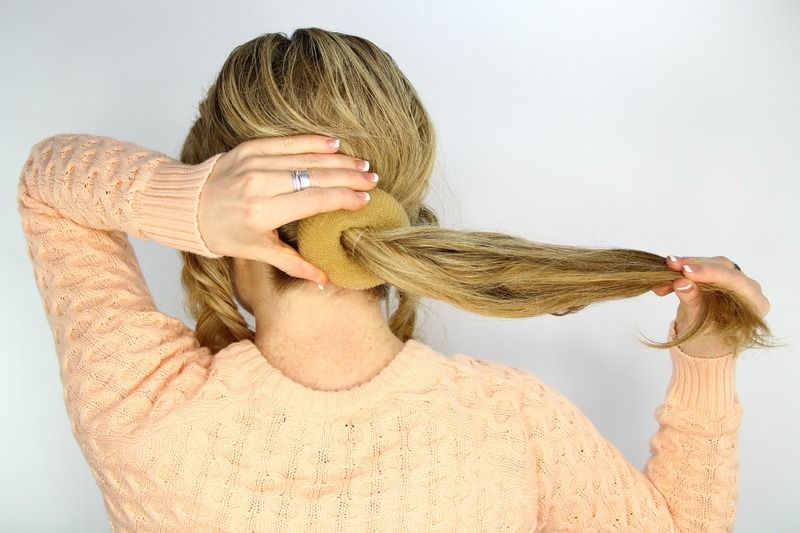
Let down the hair at the back and sweep it up into a low ponytail, tying it off with another elastic band.


Step 7
Take a hair donut and wrap it over the ponytail.


Step 8
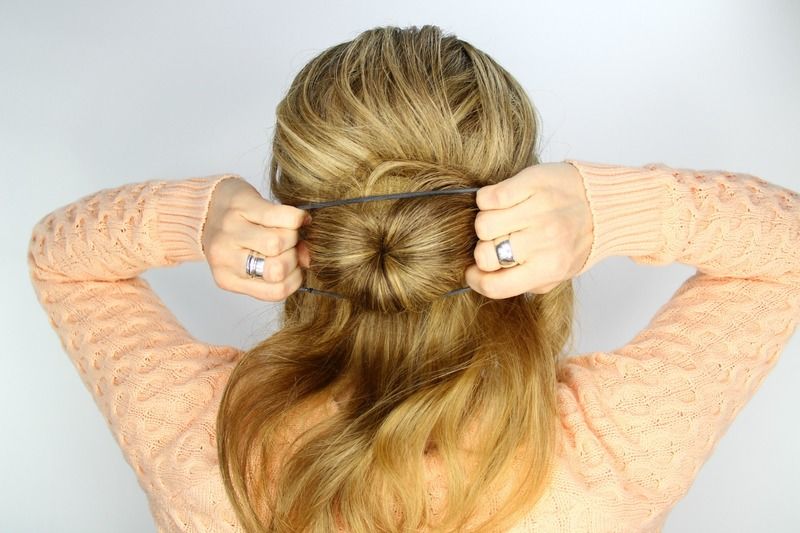
Spread the hair around the donut and wrap another hair band over the top to secure it.


Step 9
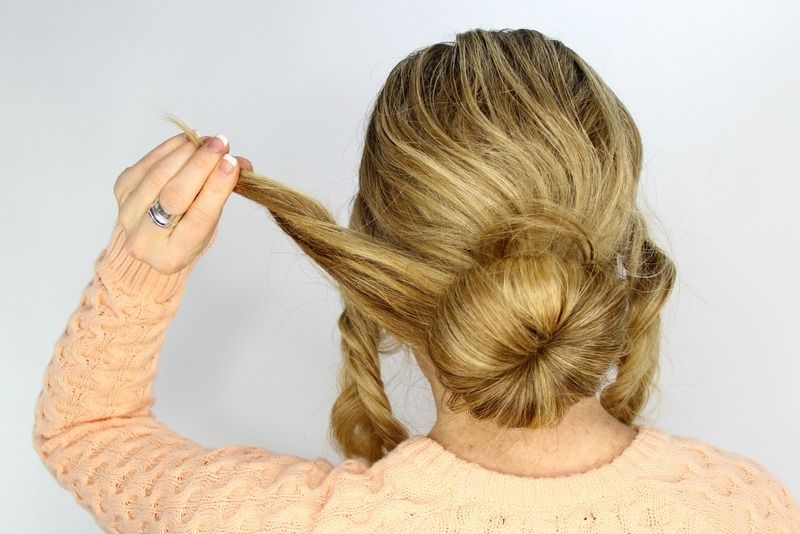
Twist the hair sticking out from the donut and wrap it around the base of the bun.


Step 10
Pin down the ends with a hair pin.


Step 11
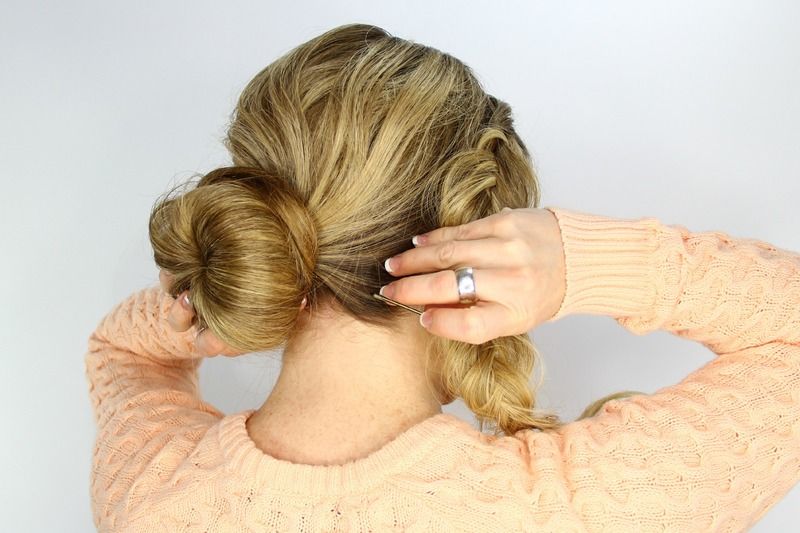
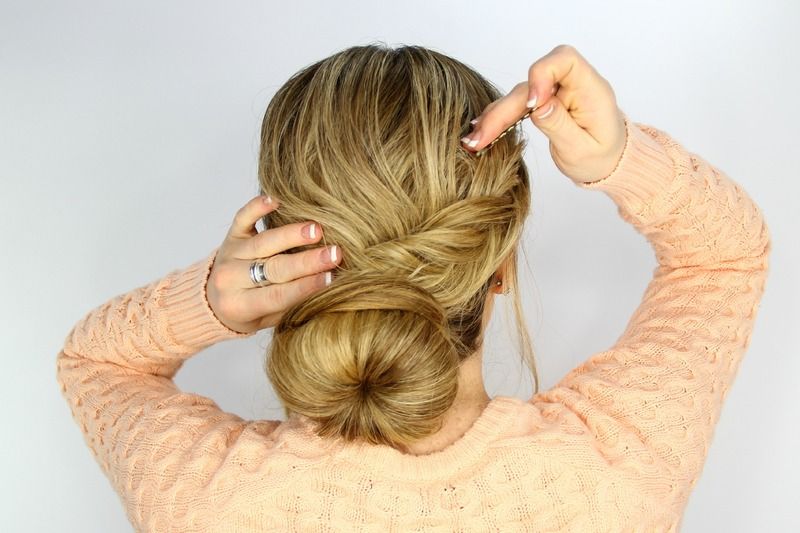
Pick up the braid from the right side of the head and wrap it over the top of the bun and around to the left side.


Step 12
Slide in some hair pins to secure the braid against the head.


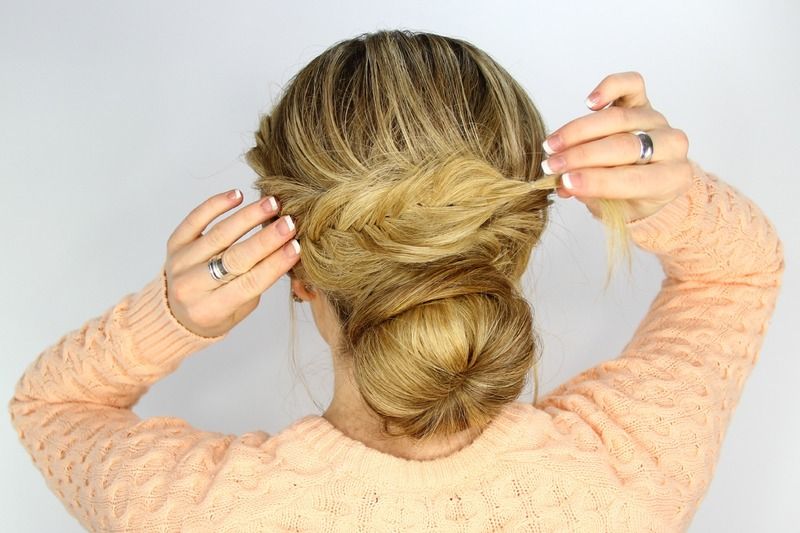
Step 13
Now wrap the braid from the left side over the bun.


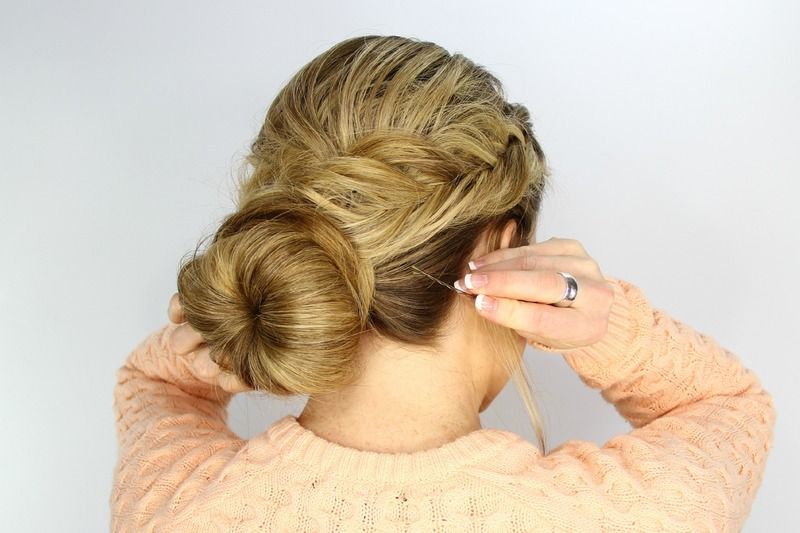
Step 14
Pin this braid down with another hair pin.


Step 15
Shower the style with hairspray and smooth down any flyaways.


Will you be giving this fishtail wrapped bun tutorial a try this weekend?  If you so, tag us so we can see and share your photos! 

Instagram: @latinflavadesigns

Twitter: @latncookndiva

Pinterest: @latinflavadesgn


Tuesday, July 21, 2015

How To Multi-Mask Skin and Hair

How to Multi-Mask Skin and Hair - The Daily Fashion and Beauty News


Behind The #Multimasking Trend:


Beauty Experts Explain How To Multi-Mask Skin and Hair


Multi-Masking for Skin


"Why tackle one skin issue when you can tackle them all at the same time and look like a warrior princess while doing it," explains Ami Shvartzman, Director of Education for Osmosis Pur Medical Skincare. Check out how you can try “multi-masking” with this protocol from Osmosis Skincare.

Step 1: T-Zone
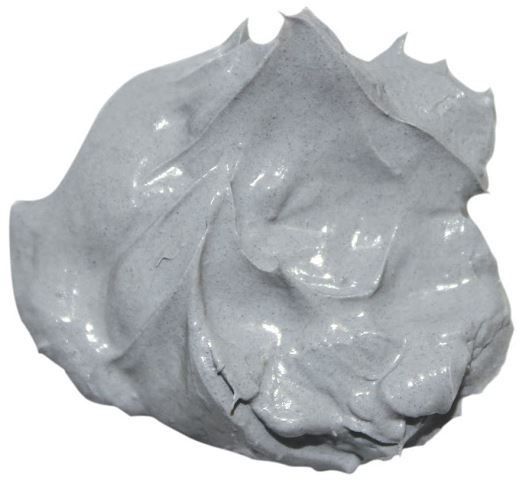
The Osmosis Pore Minimizing Clay Mask is the perfect tool to use for a combination/oily t-zone area. It is a non-drying clay based mask which balances and detoxifies the skin. It uses ingredients like Kaolin and Bentonite Clay to help refine the skin’s texture and smooth out larger pores. The Pore Minimizing Clay Mask also contains Argan Oil which is a sebum regulating oil perfect for controlling oil in this area of the face.

Step 2: Forehead and Cheeks
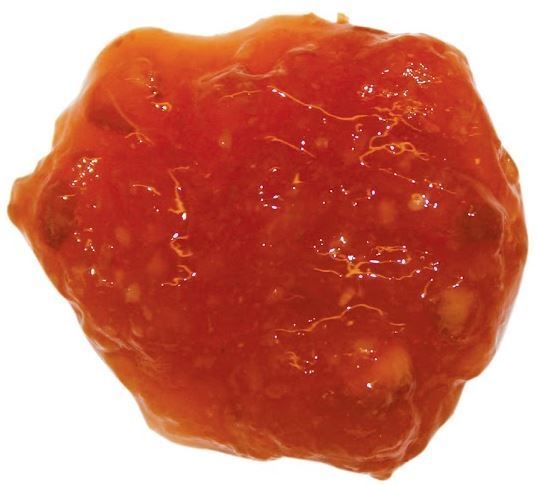
The forehead and cheeks are an area of the face that can be most affected by the damaging rays of the sun and free radicals. Try the delicious Osmosis Revitalizing Orange Zest Mask to provide firming, brightening, nourishing and collagen stimulation. The high vitamin C content in this mask will help to protect the skin from damaging free radicals while brightening the overall tone and offering wrinkle prevention for smoother, more even skin.  

Step 3: Lips
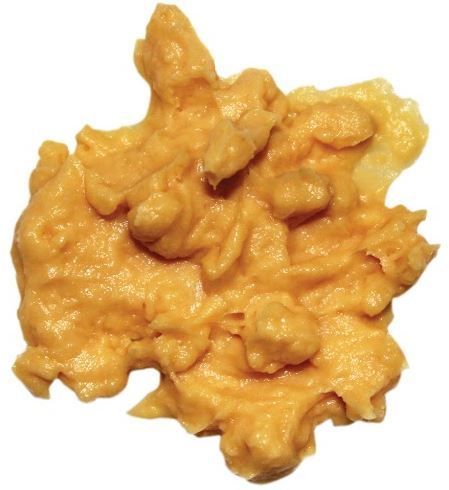
The lips are an area most often neglected when it comes to skincare. Don’t leave them out! Give the Osmosis Tropical Mango Barrier Recovery Mask a try for dry, dehydrated and damaged lips. With a combination of nut and fruit butters as well as oils, this mask will nourish, hydrate, calm down inflammation and restore even the most damaged of lips. With a heavenly scent of mango and a rich luxurious feel, your lips will thank you without even having to make a sound.

Step 4: The Neck
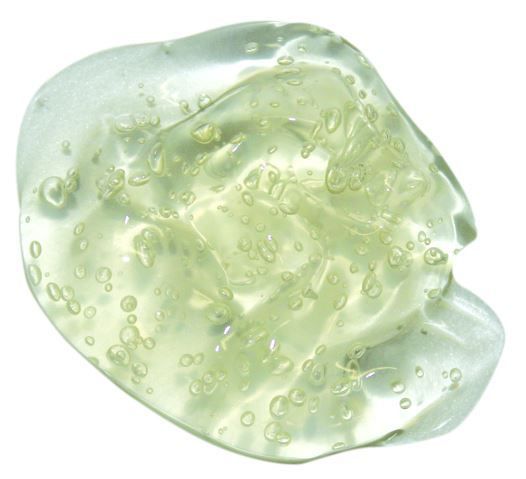
The neck can unfortunately be one of the most obvious indicators of age. Counter this by giving your neck all of the loving care it needs with a different kind of anti-aging mask. The Osmosis Hydralift Firming Gel Mask encourages hydrating and firming in the skin while providing soothing and calming benefits as well from ingredients like cucumber and aloe. The skin is plumped refreshed and has a more youthful appearance.

Multi-Masking for Hair


"The concept of multi-masking for skin can also be applied to hair," explains Kristin Utterback of hairstyling advice site www.Latest-Hairstyles.com. "When you think of how differently you treat various sections, it makes sense to apply certain masks to your ends as opposed to what treatments you would use on your scalp."

1. Apply Hair La Vie Revive Deep Hydration Masque to The Roots and Scalp
This mask contains Vitamin E, which is a great stimulant for the growth of capillaries, encouraging blood circulation in your scalp. It also helps to eliminate dandruff and itching. The product's avocado oil will then deep condition, lock in moisture and promote healthy cell growth. This ingredient is also a natural spf.

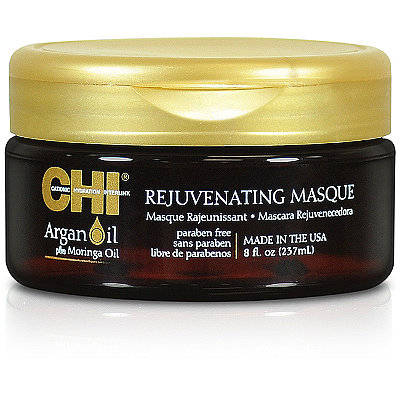
This mask's signature ceramic compound uses ceramic and proteins to provide protection to a portion of your hair that often has the most stress. The Ceramic compound releases anions on the cuticles which help to interlink the proteins into the hair strands, imparting luster and strength for a vibrant appearance. The argan oil will hydrate and nourish this dry, damaged section.

3. Apply White Sands ER Fusion to the Ends
Your ends will need some extra TLC and this Emergency Reconstructive Treatment will do the trick. Plus, ER Fusion’s unique delivery system ensures optimum performance with results lasting 30 days after each initial use. Frayed, split ends will feel softer and more manageable.


Depending on your individual needs, are you willing to begin multi-masking as part of your skin / hair care routines? 

Wednesday, May 20, 2015

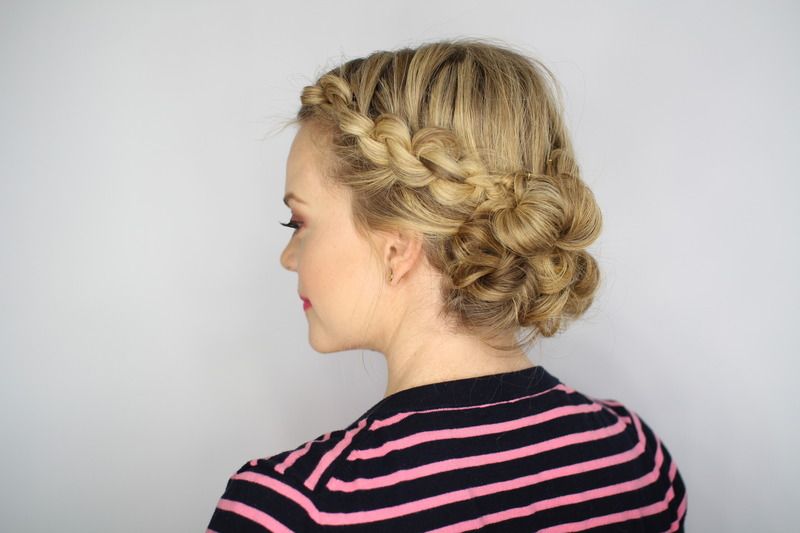
The Easiest Knotted Updo Tutorial You’ll Ever Try

The Easiest Knotted Updo Tutorial You’ll Ever Try


Today's hair tutorial is being shared by  Latest-Hairstyles.com contributor Melissa Cook.

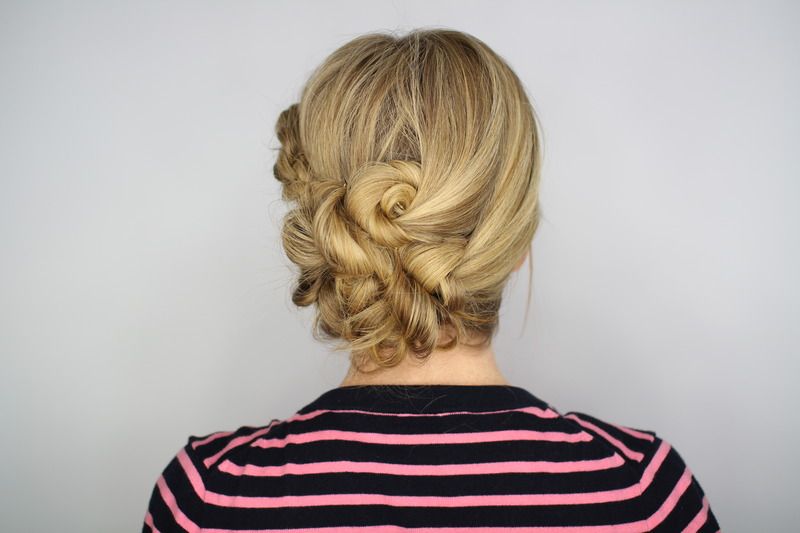
This gorgeous knotted updo is the perfect hairstyle for spring/summer. I will warn you - there are quite a few steps to achieving this updo, however the steps are so easy to do, you won't even mind! 

According to  Melissa Cook , "this knotted ‘do is perfect because it is one of those styles
that can be worn with sunglasses and a pair of jeans during the day, or a little sequined dress and some heels in the evening. I am sure with everything we do all day, having a hairstyle that can transition from day to night is always a must-have in our beauty regimen. This hairstyle really does require a little bit of hair tying, but the back portion can be changed up to accommodate any type of knot or wrapped bun. Just play around a little bit and see how it works out for you. This can literally be worn nearly anywhere and is the perfect everyday hairstyle!"

Now, let's see exactly how Melissa creates this effortless hairstyle. 

The Easy Knotted Updo Tutorial:


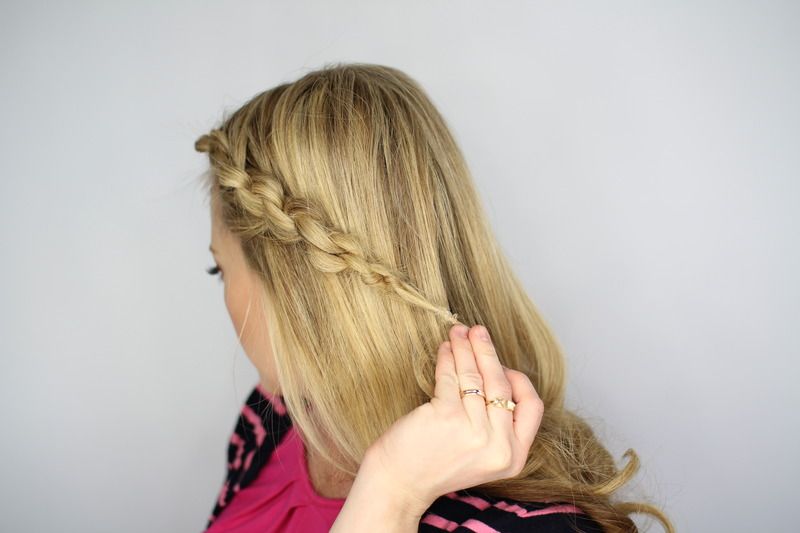
Step 1


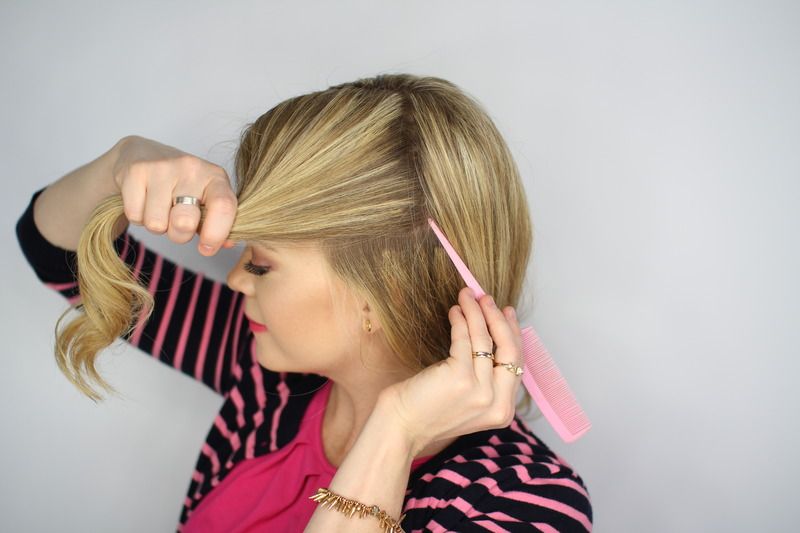
Begin with a part on the right side, then separate off a square section of hair from the part down to eye level.


Step 2


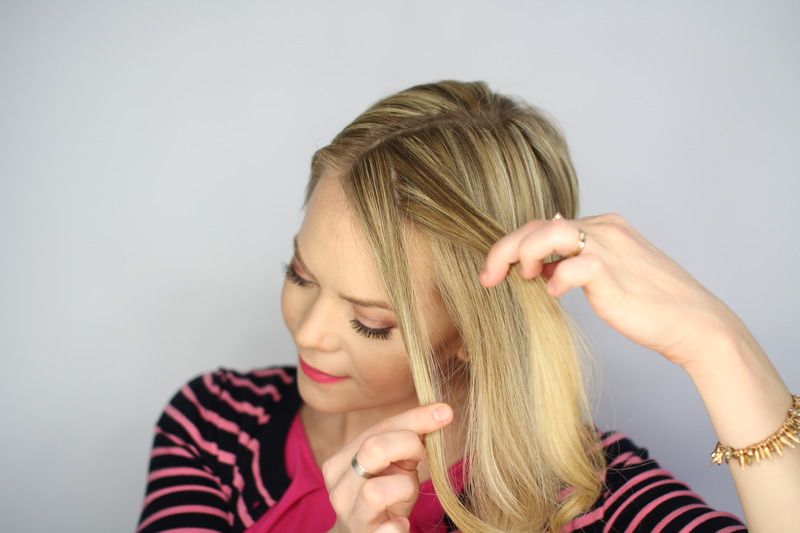
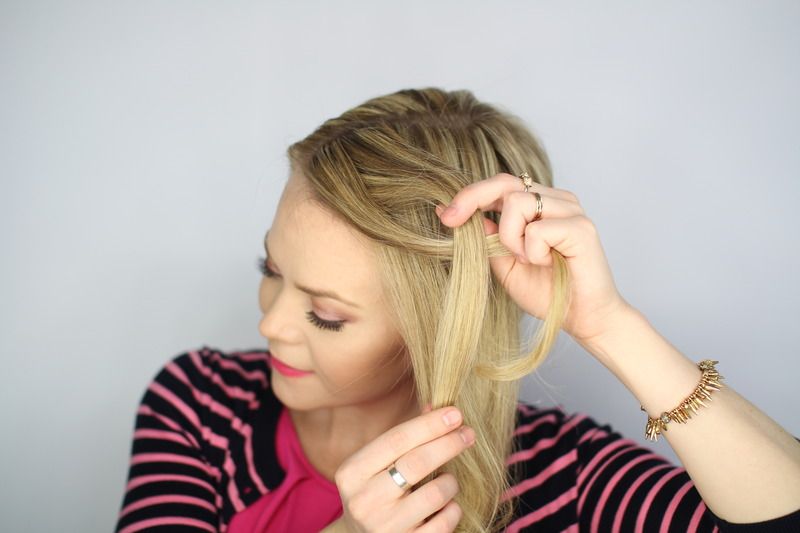
Pick up a small section of hair next to the part and divide it into two halves.


Step 3


Cross the back half over the front so it creates a small space between the two strands.


Step 4


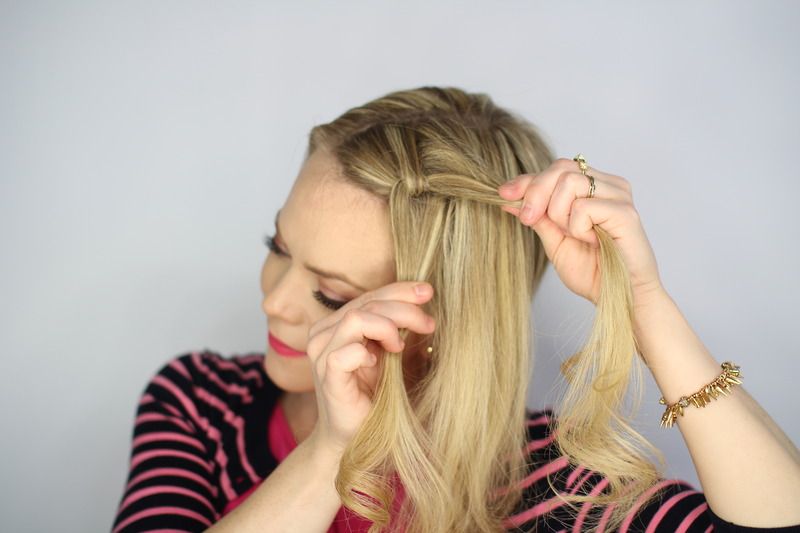
Wrap the tail through the hole created so the hair forms half a knot.


Step 5


Pull it tight so it lays against the head and pick up small sections of hair, adding them into each strand.


Step 6


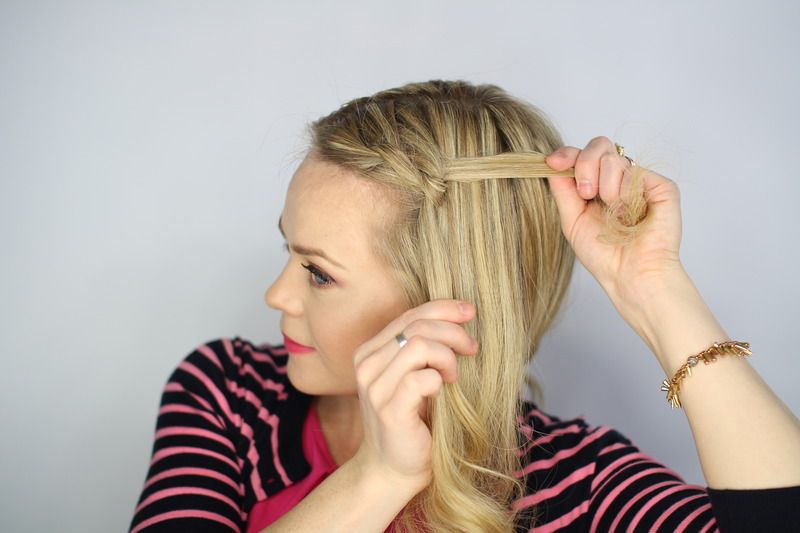
Create a second knot by crossing the back strand over the front, then looping the end through the hole before pulling it tight again.


Step 7


Repeat step 6, bringing in hair and tying it into knots.


Step 8


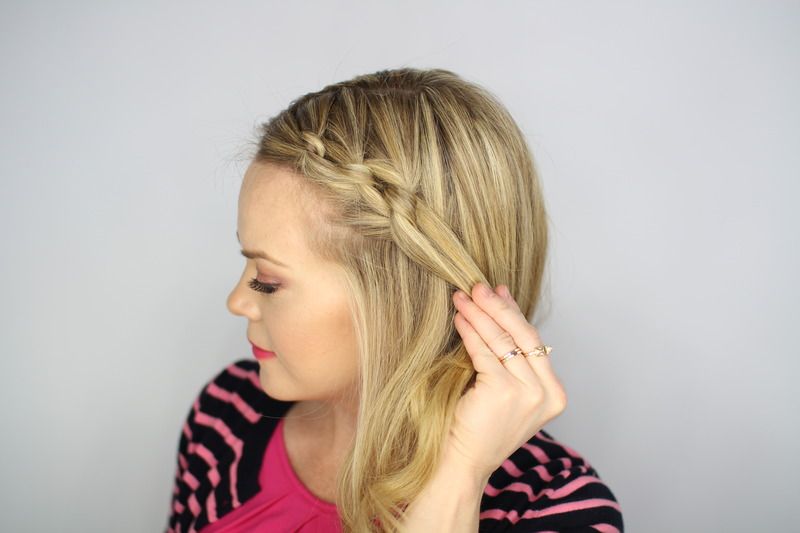
Continue tying knots until it reaches the end of the strands, then tie it off with a clear elastic band and pin it against the back of the head.


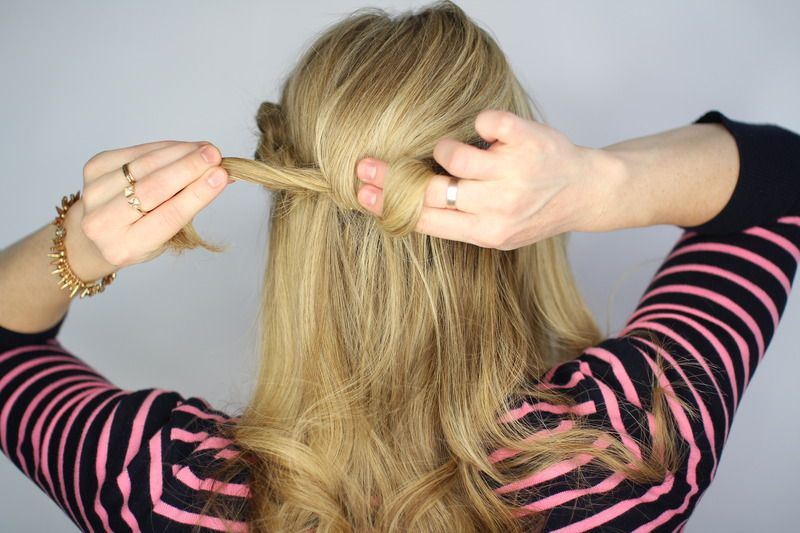
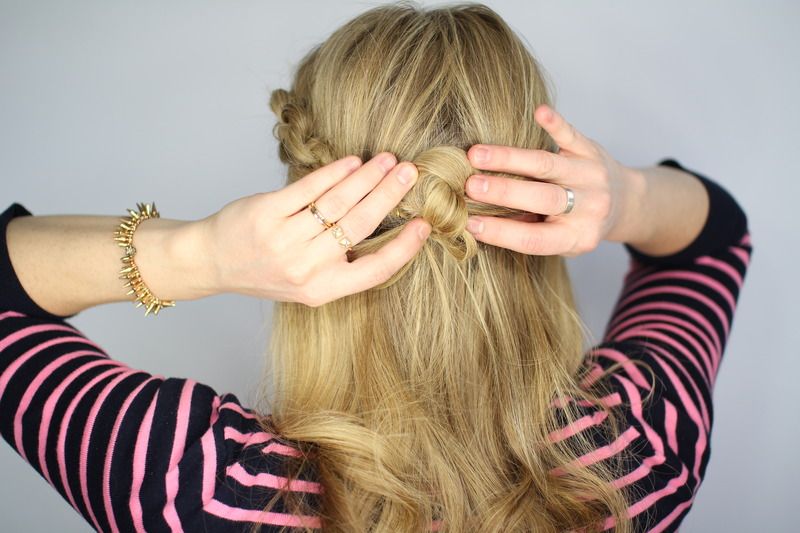
Step 9


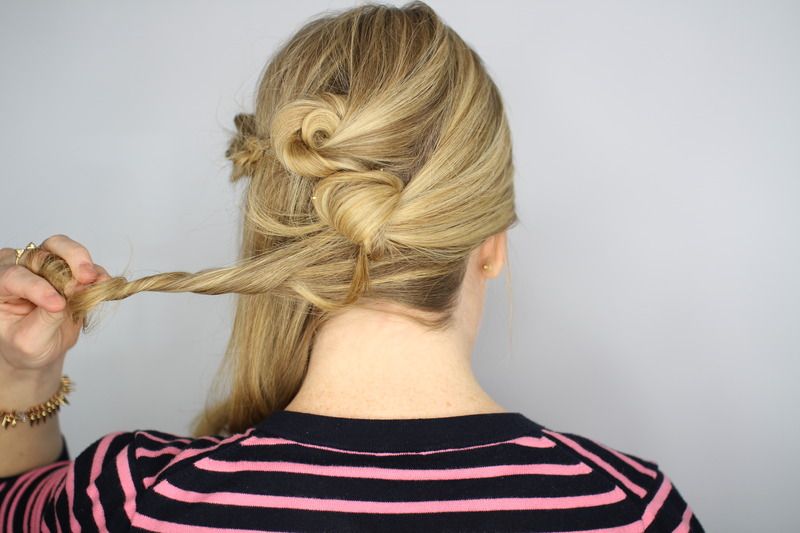
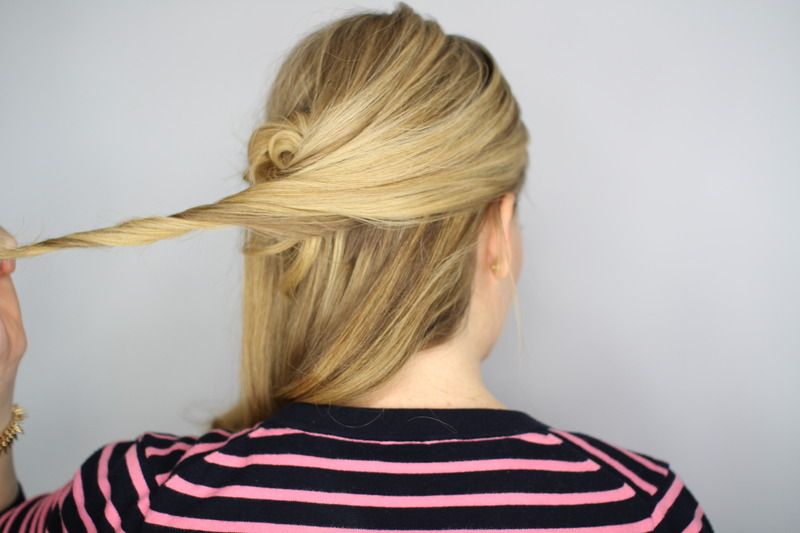
Pick up a two-inch section of hair at the center of the back of the head and wrap the strand around your fingers. Twist the fingers counter-clockwise so the hair forms a little knot.


Step 10


Secure the knot in place with hair pins.


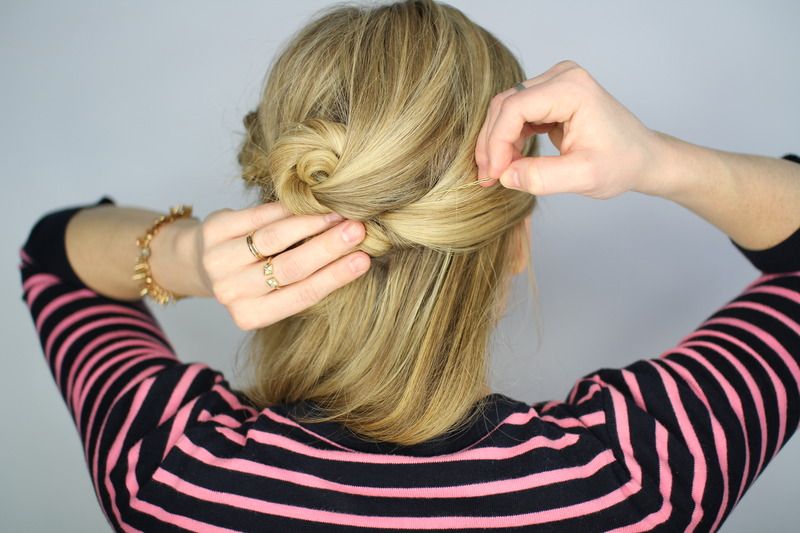
Step 11


Next, pick up another two-inch section of hair to the right of the first knot in step 9.


Step 12


Wrap this hair into another knot and pin it in place.


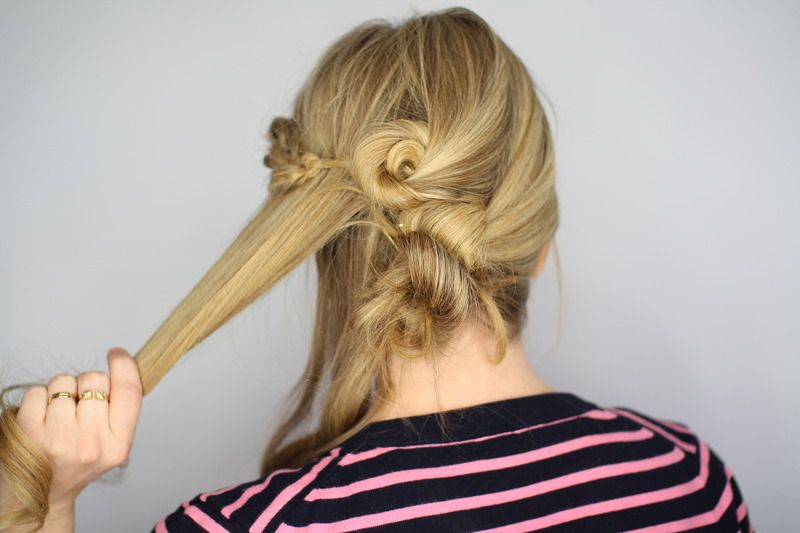
Step 13


Next, pick up a section of hair below the second knot and create a third knot, securing it against the head with hair pins.


Step 14


Then take a section of hair to the left of the first knot and wrap it into another knot, securing it with hair pins.


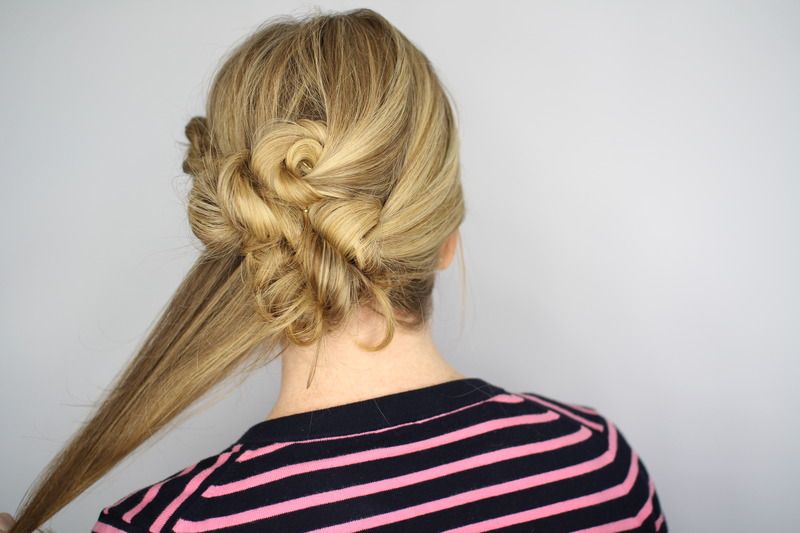
Step 15


Finally, pick up the last section of hair and create one last knot, securing it with pins.


Done!


Tell us:  Will you give this easy knotted updo a try?