
The Easiest Knotted Updo Tutorial You’ll Ever Try
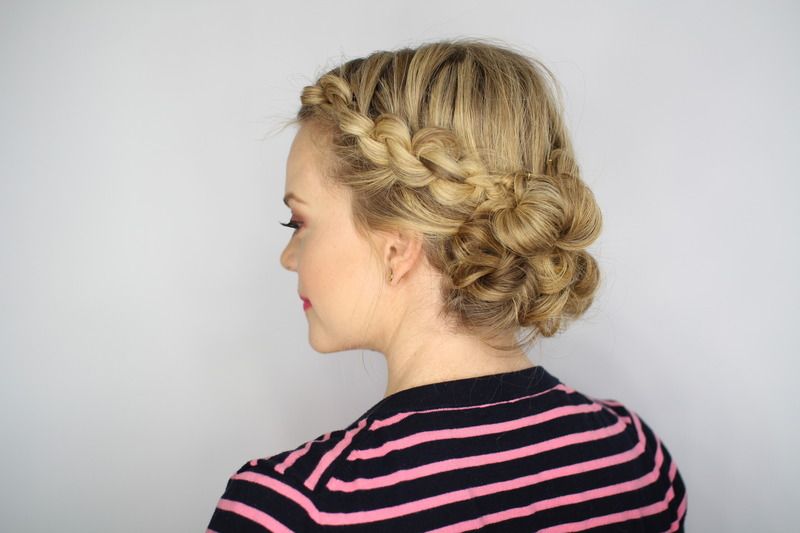
This gorgeous knotted updo is the perfect hairstyle for spring/summer. I will warn you - there are quite a few steps to achieving this updo, however the steps are so easy to do, you won't even mind!
that can be worn with sunglasses and a pair of jeans during the day, or a little sequined dress and some heels in the evening. I am sure with everything we do all day, having a hairstyle that can transition from day to night is always a must-have in our beauty regimen. This hairstyle really does require a little bit of hair tying, but the back portion can be changed up to accommodate any type of knot or wrapped bun. Just play around a little bit and see how it works out for you. This can literally be worn nearly anywhere and is the perfect everyday hairstyle!"
Now, let's see exactly how Melissa creates this effortless hairstyle.
The Easy Knotted Updo Tutorial:
Step 1
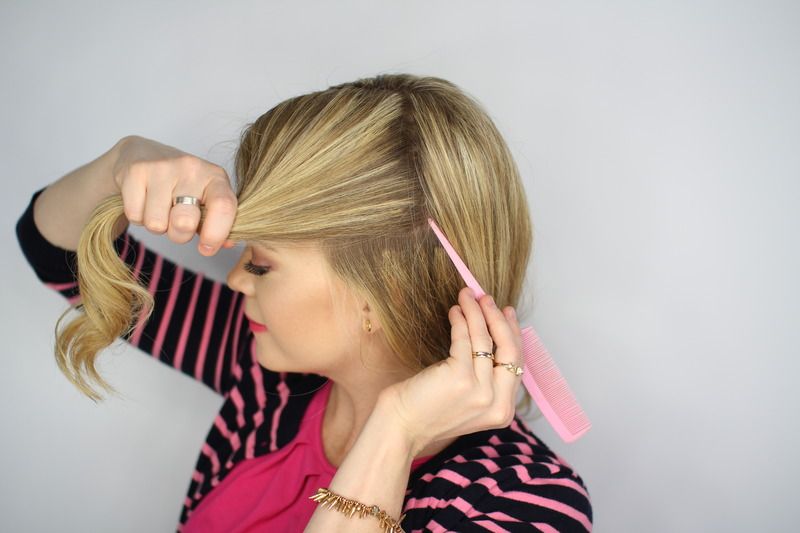
Begin with a part on the right side, then separate off a square section of hair from the part down to eye level.
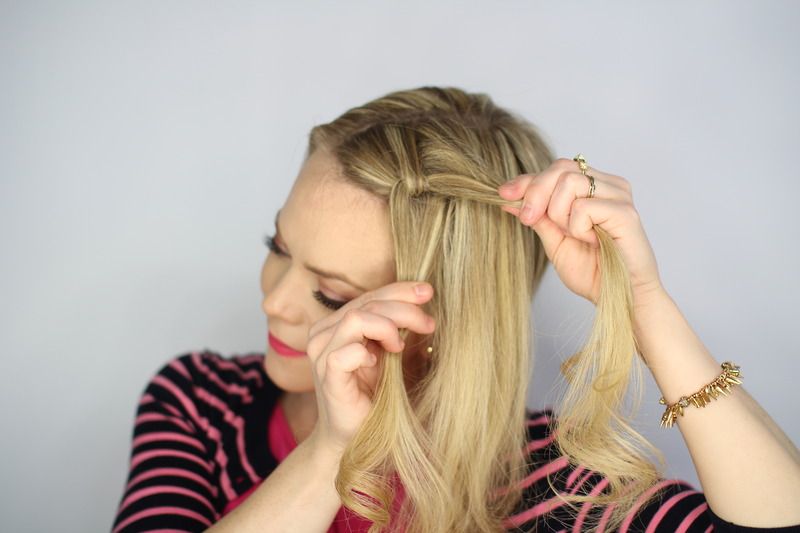
Step 2
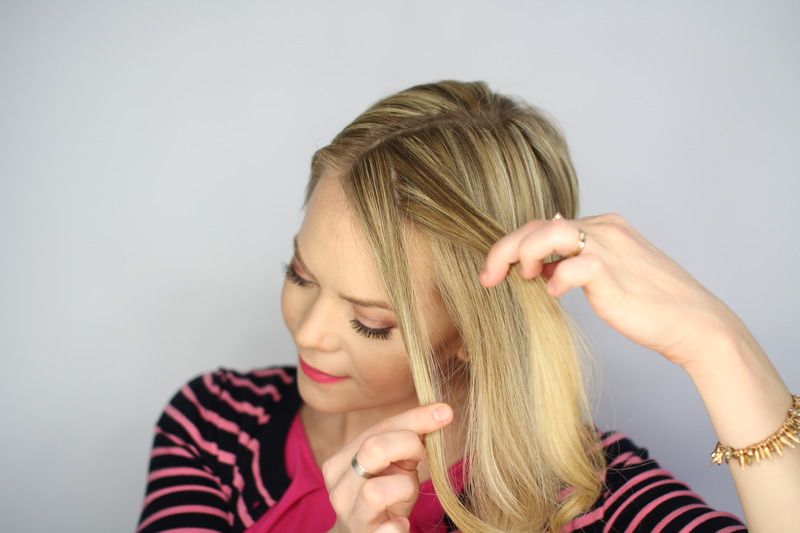
Pick up a small section of hair next to the part and divide it into two halves.
Step 3
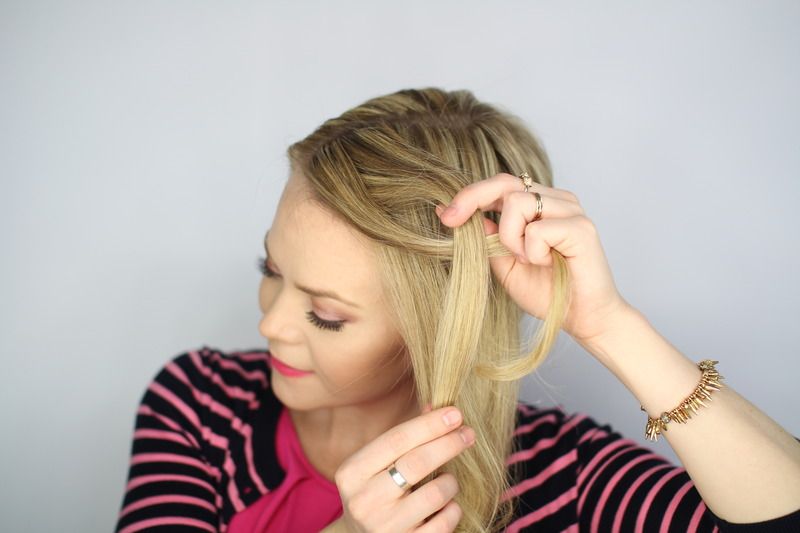
Cross the back half over the front so it creates a small space between the two strands.
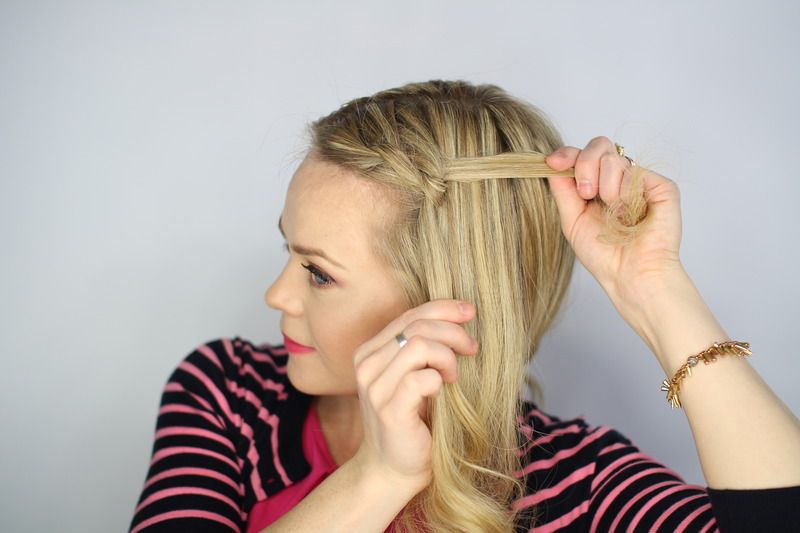
Step 4

Wrap the tail through the hole created so the hair forms half a knot.
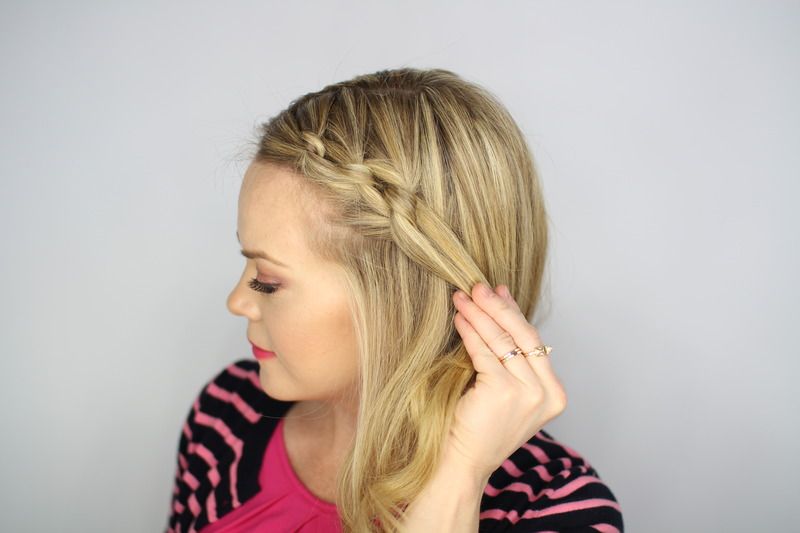
Step 5
Pull it tight so it lays against the head and pick up small sections of hair, adding them into each strand.
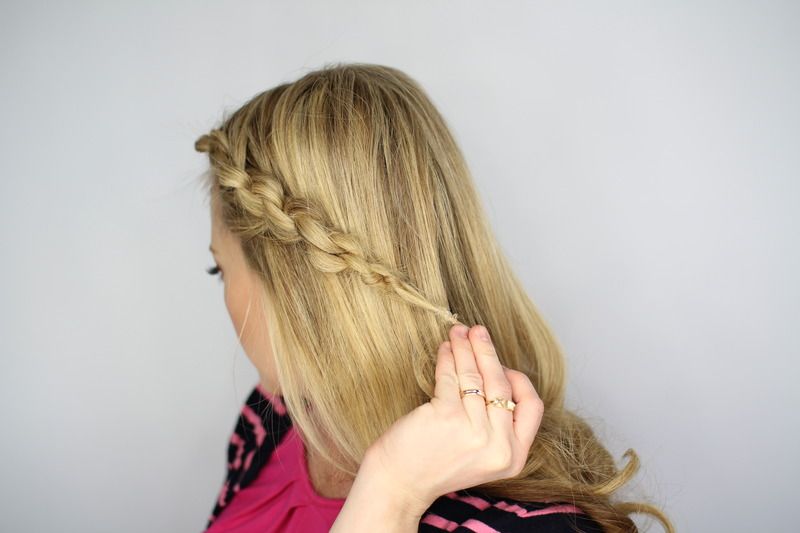
Step 6
Create a second knot by crossing the back strand over the front, then looping the end through the hole before pulling it tight again.
Step 7
Repeat step 6, bringing in hair and tying it into knots.
Step 8
Continue tying knots until it reaches the end of the strands, then tie it off with a clear elastic band and pin it against the back of the head.
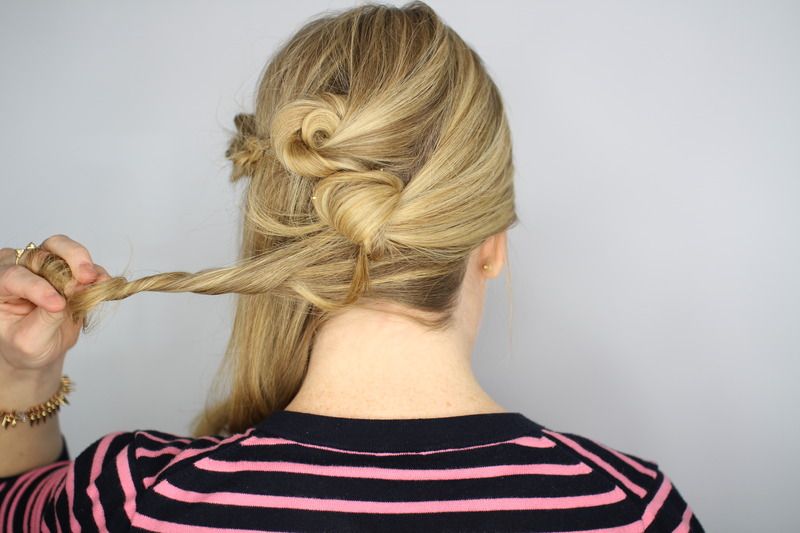
Step 9
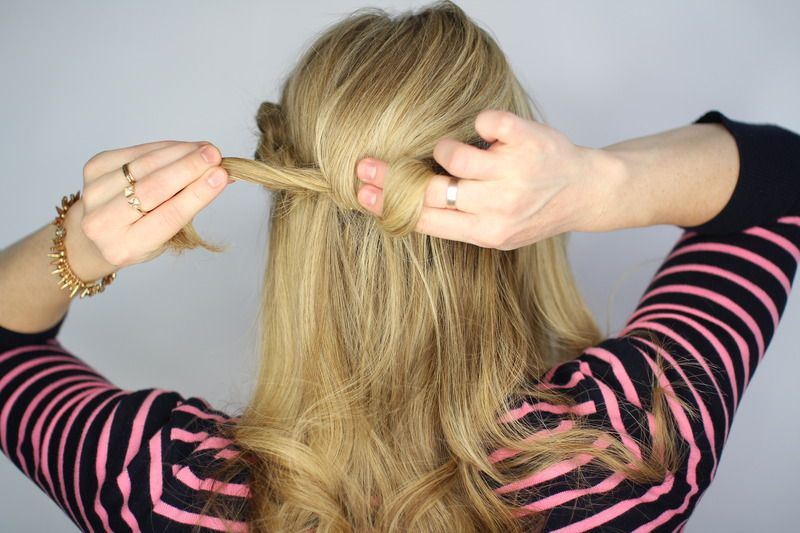
Pick up a two-inch section of hair at the center of the back of the head and wrap the strand around your fingers. Twist the fingers counter-clockwise so the hair forms a little knot.
Step 10
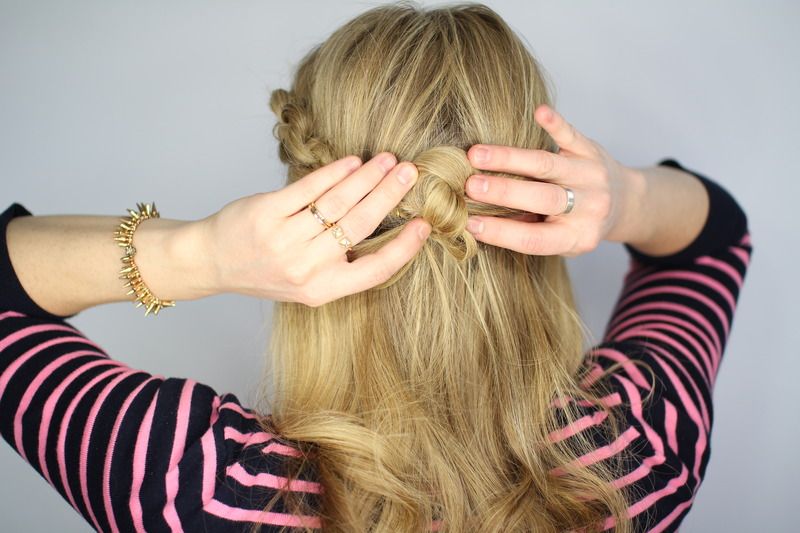
Secure the knot in place with hair pins.
Step 11
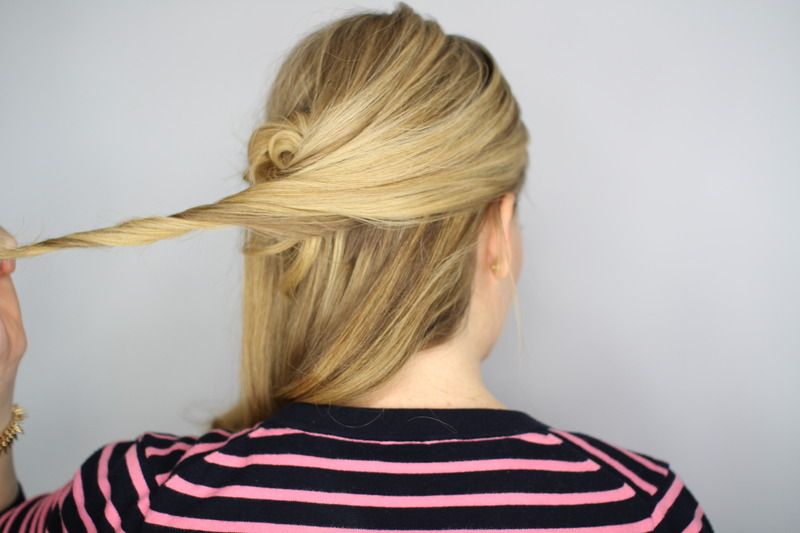
Next, pick up another two-inch section of hair to the right of the first knot in step 9.
Step 12
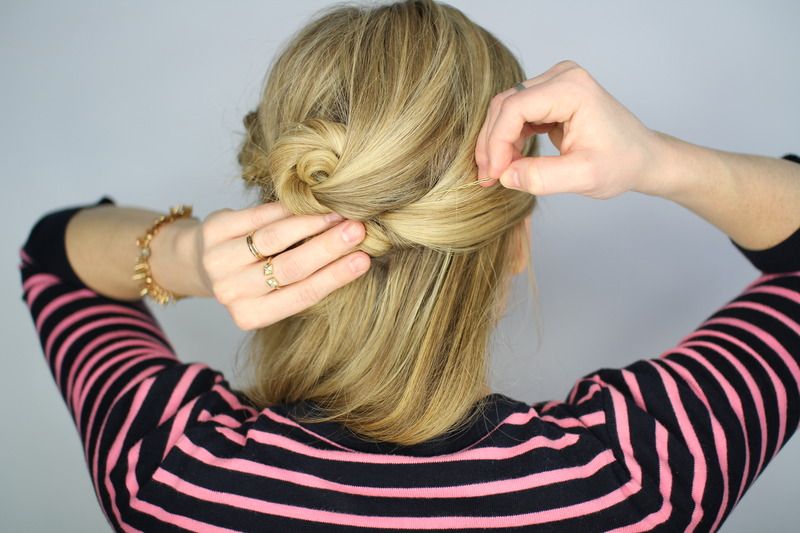
Wrap this hair into another knot and pin it in place.
Step 13
Next, pick up a section of hair below the second knot and create a third knot, securing it against the head with hair pins.
Step 14
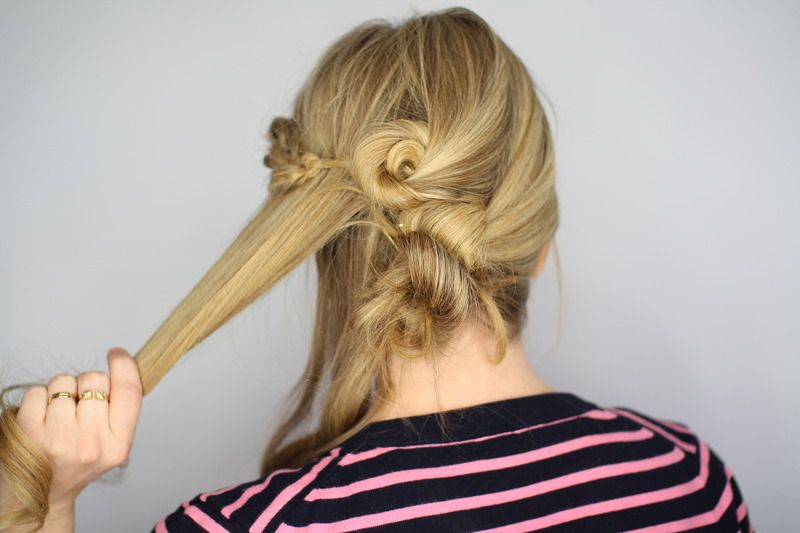
Then take a section of hair to the left of the first knot and wrap it into another knot, securing it with hair pins.
Step 15
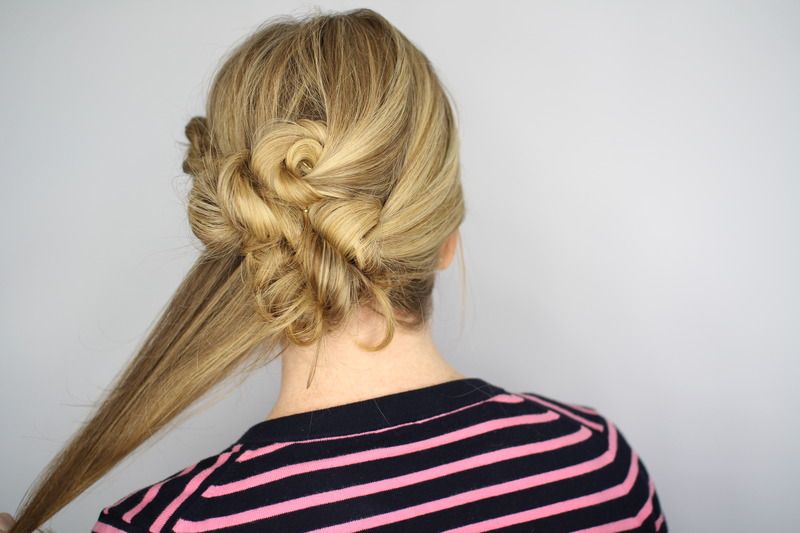
Finally, pick up the last section of hair and create one last knot, securing it with pins.
Done!
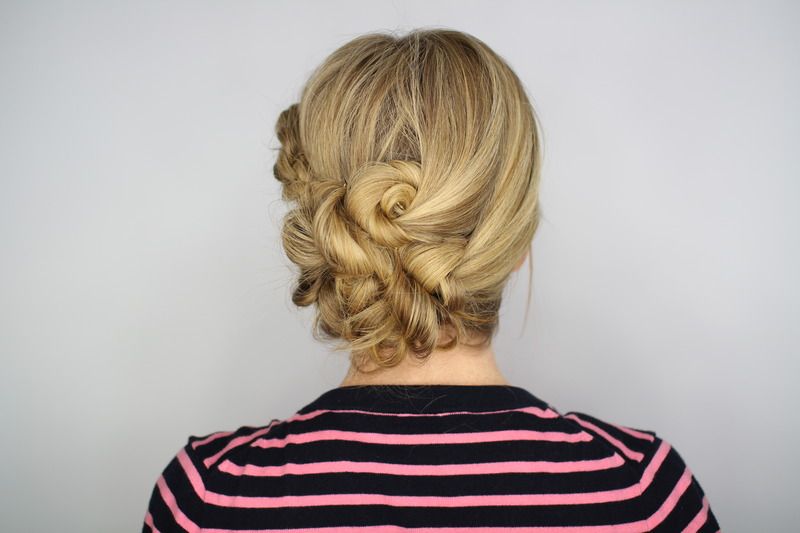
Tell us: Will you give this easy knotted updo a try?
No comments:
Post a Comment